Aha! is one of the most popular roadmapping tools on the market, and for good reason. It gives product teams a structured way to connect strategy to execution, turning scattered ideas into a visual plan your whole organization can rally behind. But building an effective Aha product roadmap isn't just about dragging cards into columns. It requires clear inputs, deliberate prioritization, and a process that keeps your roadmap grounded in reality.
That's where most teams hit a wall. A roadmap is only as good as the feedback feeding into it. If you're guessing which features matter most, or relying on the loudest voice in the room, your roadmap becomes a wishlist, not a strategy. Tools like Koala Feedback solve this by giving you a centralized place to collect, organize, and prioritize user feedback before it ever reaches your roadmap. When your inputs are solid, your Aha! roadmap actually reflects what users need.
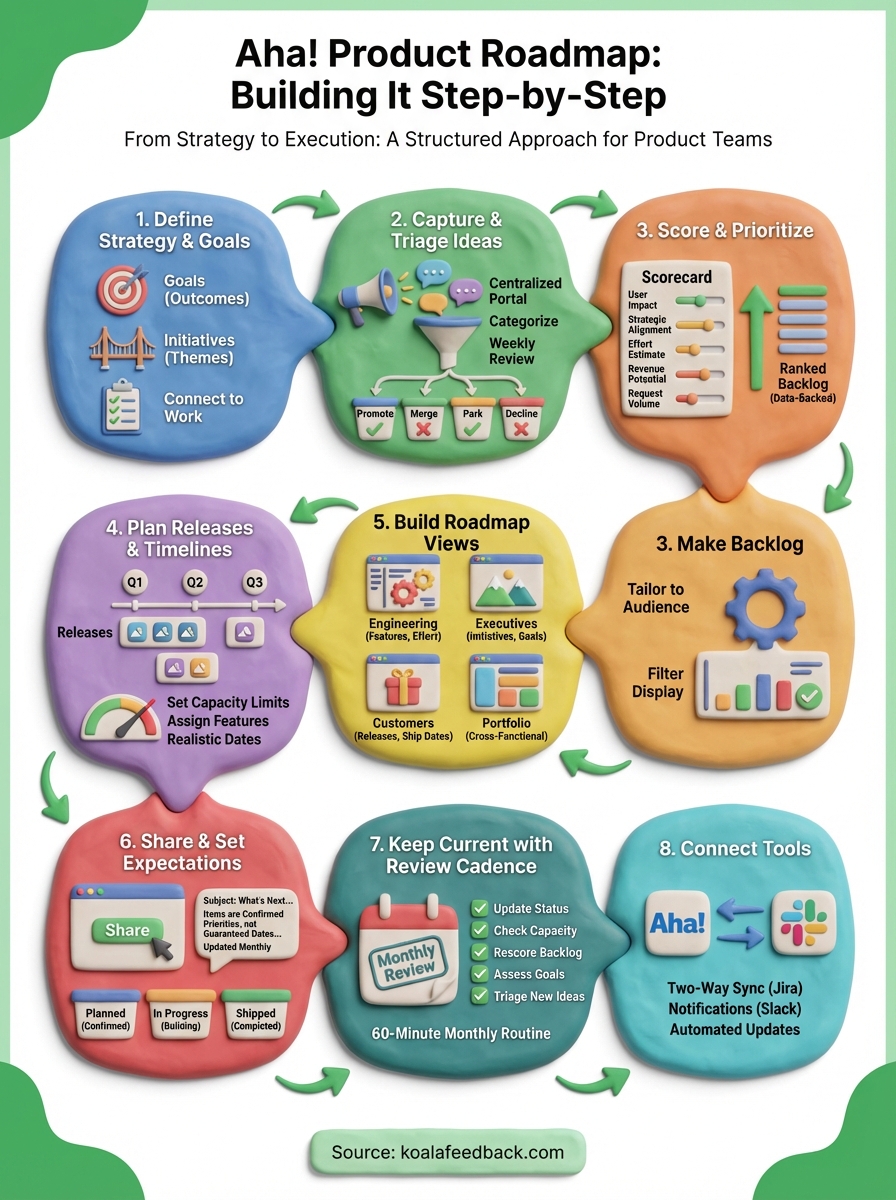
This guide walks you through how to build a product roadmap in Aha! Roadmaps step by step. You'll learn how to set up your workspace, define releases, organize features by priority, and share your roadmap publicly. Whether you're new to Aha! or looking to tighten up your existing workflow, you'll find practical steps you can apply right away.
Before you build your first Aha product roadmap, a few things need to be in order. Jumping straight into the tool without the right setup leads to a messy workspace that's hard to fix later. Taking 30 minutes to prepare upfront saves you hours of reorganizing down the road.
Aha! offers several product tiers, and the one you choose determines which features you can access. The core Aha! Roadmaps plan covers features, releases, and roadmap views. If you need more advanced capacity planning or portfolio management, look at the higher-tier options. Sign up at aha.io and walk through the initial workspace setup wizard before you do anything else.
During setup, you'll be asked to create your first workspace, which represents a single product or product line. If you manage multiple products, you can create multiple workspaces and group them under a workspace line. Get this structure right at the start, because it affects how your data rolls up across reports and roadmap views later.
The workspace hierarchy in Aha! is the backbone of everything else. Build it wrong, and you'll spend time migrating data instead of building your product.
Aha! organizes work in a specific hierarchy: goals sit at the top, followed by initiatives, then epics, features, and requirements. Understanding this structure before you touch the tool is critical. If you try to learn the hierarchy while also building your roadmap, you'll make decisions you'll want to undo.
Here's a quick breakdown of each level and what it represents:
| Level | What it represents |
|---|---|
| Goals | High-level strategic outcomes tied to your business |
| Initiatives | Large themes or programs of work that support goals |
| Epics | Groups of related features that deliver a capability |
| Features | Individual pieces of functionality users will experience |
| Requirements | Granular tasks or specifications inside a feature |
Map this to your actual product before you log in. Sketch it on paper or in a spreadsheet. Knowing where your current backlog items fit in this hierarchy makes importing and organizing them much faster.
Your roadmap is only as useful as the inputs feeding it. Before you start planning releases in Aha!, gather your existing user feedback, feature requests, and internal ideas into one place. If your feedback is scattered across emails, Slack threads, and support tickets, your roadmap will reflect that chaos.
Tools like Koala Feedback let you consolidate and organize user requests so you can enter Aha! with a ranked list of ideas rather than a pile of noise. When each idea already has votes, comments, and a category attached to it, translating it into an Aha! feature or epic becomes straightforward. You're making decisions based on real user demand, not gut feel.
A quick pre-start checklist before you open Aha!:
Every Aha product roadmap starts with strategy, not features. If you skip this step and jump straight to filling in features and timelines, you'll build a roadmap that looks busy but lacks direction. Aha! is designed to connect your high-level business outcomes to the actual work your team ships, so defining your goals first makes everything downstream easier to prioritize and justify.
In Aha!, navigate to Strategy > Goals inside your workspace. Each goal you create should represent a measurable outcome you want to achieve within a specific timeframe, not a vague ambition. Keep the total number of goals small. Three to five per quarter is enough. More than that, and nothing gets real focus.
Use this template when writing each goal:
| Field | Example |
|---|---|
| Goal name | Increase trial-to-paid conversion |
| Description | Reduce friction in the onboarding flow so more trials convert within 14 days |
| Success metric | Conversion rate from 18% to 28% by end of Q3 |
| Owner | Head of Product |
| Time horizon | Q3 2026 |
Fill out every field. Goals with no owner or no metric are just wishes. Once your goals exist in Aha!, every feature and initiative you create can be linked back to a goal, which makes prioritization conversations much more grounded.
If a feature doesn't connect to a goal, that's a signal to question whether it belongs on the roadmap at all.
Initiatives sit between goals and features in the Aha! hierarchy. Think of them as strategic themes that group related work together. Go to Strategy > Initiatives and create one initiative per major area of focus. For the goal example above, you might create an initiative called "Onboarding Simplification" that captures all the features aimed at improving the trial experience.
When you name your initiatives, be specific enough that any team member can tell what kind of work belongs there. Avoid initiative names like "Growth" or "Improvements." Instead, try "Reduce time-to-first-value for new signups" or "Streamline billing and upgrade flows." Clear naming makes it much easier to triage incoming feature requests and assign them correctly in the next step.
Before you can build a useful Aha product roadmap, you need a reliable intake process. Without one, feature ideas pile up in email threads, Slack messages, and sticky notes, and you lose visibility into what users actually want. Aha! gives you two ways to capture this input: the built-in Ideas portal and direct feature creation inside your workspace.
The Ideas portal is a public-facing page where users can submit requests, vote on existing ideas, and leave comments. To activate it, go to Settings > Ideas inside your workspace and toggle the portal on. You can customize the portal with your brand colors and domain, then share the link directly with your users.
When you first set it up, configure at least two or three idea categories that match your product areas. This keeps submissions organized from day one and makes triage faster. For example:
A well-categorized ideas portal cuts your triage time in half because submissions arrive pre-sorted instead of as a single undifferentiated list.
If you already use a dedicated feedback tool like Koala Feedback to collect and prioritize requests, you can use that as your primary intake layer and then promote the top-voted ideas directly into Aha! as features or initiatives. This keeps your Ideas portal clean and ensures only high-signal requests make it into your roadmap.
Capturing ideas means nothing if they sit unreviewed. Set a recurring triage session once a week, ideally 30 minutes, where you and your team review new submissions and decide what to do with each one. Each idea should get one of four outcomes:
| Outcome | What it means |
|---|---|
| Promote to feature | Ready to evaluate for an upcoming release |
| Merge with existing | Duplicate of a request already in the backlog |
| Park for later | Interesting but not a current priority |
| Decline | Out of scope or misaligned with strategy |
Aha! lets you handle all four actions directly from the Ideas portal. When you promote an idea to a feature, it moves into your workspace backlog with the original votes and comments attached, so you carry the user context forward without any manual copying.
Once your backlog has a solid set of features, the next challenge is deciding what to build first. Without a consistent scoring method, prioritization becomes a political exercise where whoever speaks loudest wins. Aha! includes a built-in feature scoring system that gives every item a numerical score based on criteria you define, making your aha product roadmap defensible and data-backed.
Go to Settings > Workspace > Features and find the scoring section. Aha! lets you build a custom scorecard using any combination of factors relevant to your product. A practical starting point for most SaaS teams looks like this:
| Scoring factor | Weight | What it measures |
|---|---|---|
| User impact | High | How much this improves the experience for existing users |
| Strategic alignment | High | How closely this ties to a current goal or initiative |
| Effort estimate | Medium (inverse) | How much engineering work it requires |
| Revenue potential | Medium | Whether it opens new upsell or expansion opportunities |
| User request volume | Medium | How many users have asked for this feature |
Once you've added your factors, Aha! calculates a composite score for each feature automatically. You can sort your backlog by score at any time, which gives you a ranked list you can defend in any prioritization meeting without relying on gut feel.
Scoring only works if you fill it in consistently. Block 15 minutes during each triage session to score every new feature before you move on.
A scoring model is only as accurate as the data going into it. User request volume is often the factor teams fill in least accurately because feedback is scattered. If you use Koala Feedback to consolidate requests before they enter Aha!, each feature arrives with a vote count already attached, making it straightforward to fill in that field with a real number.
Review your top 10 features by score at the end of each triage cycle. If something has a high score but no clear strategic connection, revisit your goal and initiative links. Features that score high across all factors and tie directly to a quarterly goal should move to the top of your planning list. Anything that scores well on effort alone but shows weak user demand deserves a second look before it takes up a release slot.
A scored backlog without a release structure is still just a list. To build a functional aha product roadmap, you need to assign features to releases with actual dates and realistic capacity limits. Aha! gives you the tools to do this without overcommitting your team, but the structure only works if you set it up deliberately.
Navigate to Releases inside your workspace and click to add a new release. Give it a clear, descriptive name that your team and stakeholders will recognize immediately. Avoid generic names like "Release 1" or "Sprint 14." Instead, use something tied to your goal or timeline, like "Q2 2026 Onboarding Improvements" or "June Billing Refresh."
Fill in the following fields for every release you create:
| Field | What to enter |
|---|---|
| Release name | Descriptive, goal-linked name |
| Release date | Target ship date |
| Development time | Estimated weeks to complete |
| Capacity | Total story points or hours available |
| Owner | Person accountable for the release |
| Linked initiative | Initiative this release supports |
Setting the capacity field is the step most teams skip, and it's the one that matters most. When you define how much work your team can actually absorb, Aha! shows you when a release is over capacity before you commit to it publicly.
Once your releases exist, go to your features backlog and start assigning your highest-scored features to the appropriate release. Aha! displays a running capacity total as you add features, so you can see in real time when a release is full. Treat that limit as a hard boundary, not a suggestion.
Padding releases with extra features because they scored well is a fast way to slip your dates and lose stakeholder trust.
When a release hits capacity, move remaining features to the next release rather than expanding the scope. Each feature should also have an effort estimate entered before assignment so the capacity calculation stays accurate. If you're using story points, align your team on the scale before you start estimating. A shared definition of what a "5-point feature" looks like prevents wildly inconsistent estimates from distorting your timeline planning before a single line of code gets written.
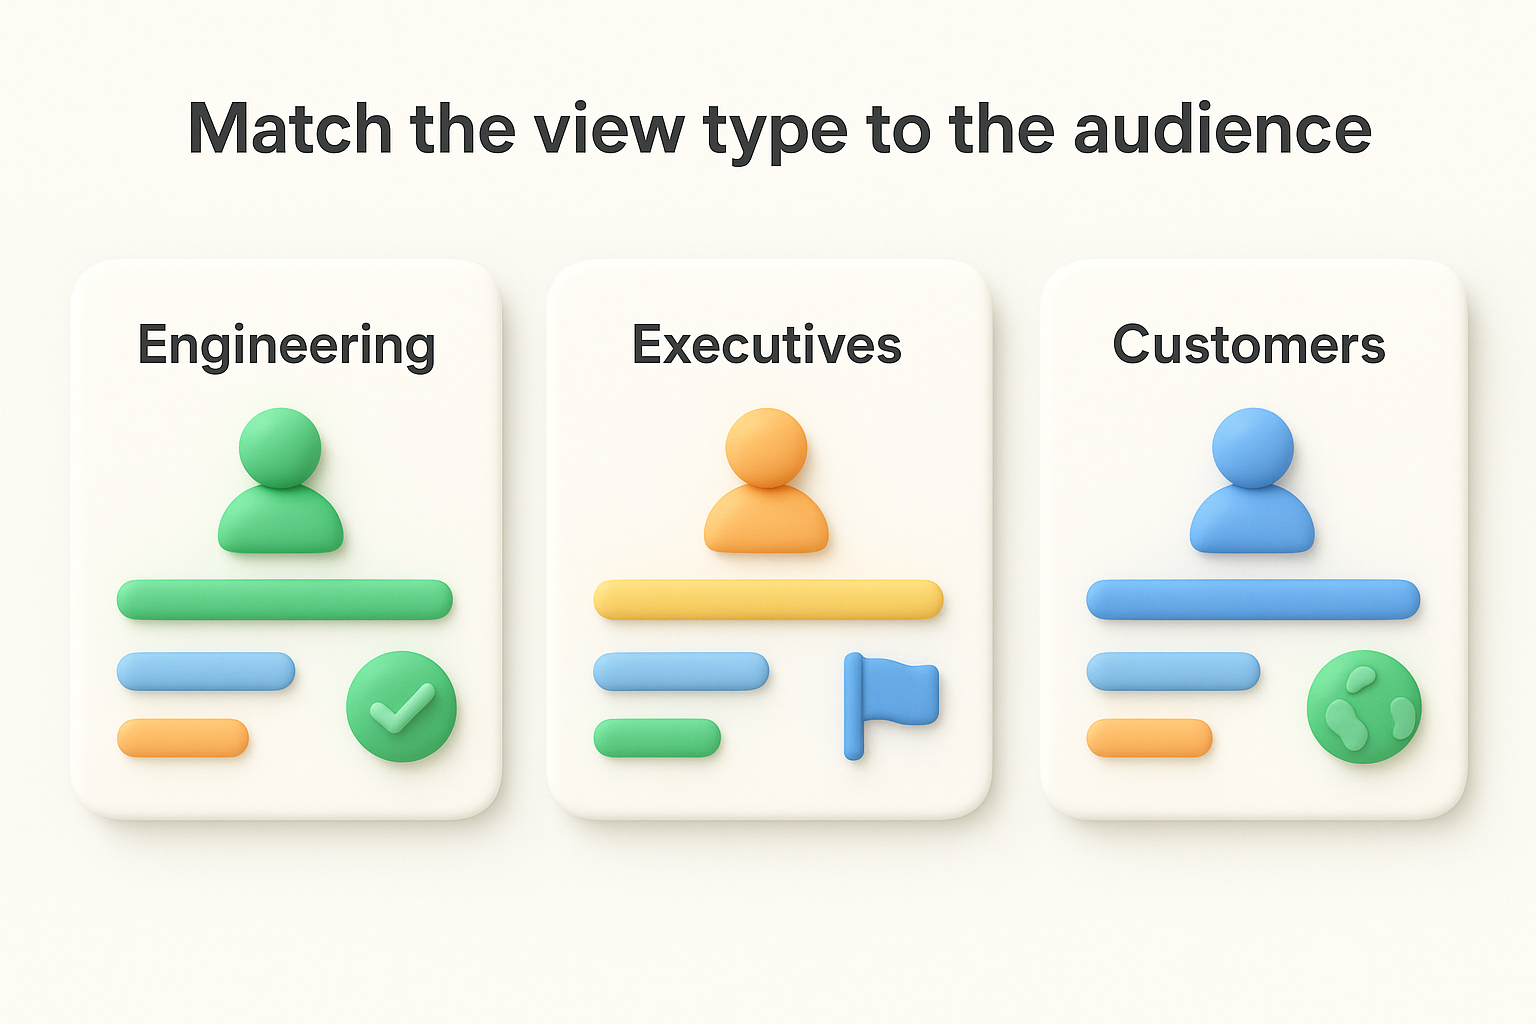
Not everyone who looks at your aha product roadmap needs to see the same thing. Engineers want feature-level detail with effort estimates and release assignments. Executives want a high-level view of strategic themes and timelines. Customers want to know what's coming without seeing your internal scoring or unconfirmed plans. Aha! lets you create multiple roadmap views from the same underlying data, so you can share the right level of detail with each group without maintaining separate documents.
Aha! offers several roadmap view formats, and picking the right one starts with knowing who will read it and what decision they need to make. Go to Roadmaps in the left navigation and click to create a new view. You'll see options including a features roadmap, releases roadmap, initiatives roadmap, and portfolio roadmap. Here's a quick reference for which view fits which audience:
| Audience | Recommended view | What to show |
|---|---|---|
| Engineering team | Features roadmap | Features, effort estimates, release dates, status |
| Executives | Initiatives roadmap | Goals, initiatives, milestones, high-level dates |
| Customers or public | Releases roadmap | Release names, features by status, ship dates |
| Cross-functional stakeholders | Portfolio roadmap | Multiple products or teams in one view |
Build at least two views before you share anything externally: one for internal use with full detail, and one for external use that shows only confirmed and in-progress items.
Sharing an unfiltered internal view with customers creates expectation problems you'll spend months managing.
Once you select a view type, use the filter panel on the right side of the screen to control exactly what appears. You can filter by release, initiative, tag, assignee, or feature status. For your external-facing view, set the status filter to show only features marked as "Planned," "In Progress," or "Shipped." This prevents unscored or speculative backlog items from appearing publicly before you're ready to commit to them.
Save each configured view with a descriptive name like "Engineering Sprint View" or "Public Q2 Roadmap" so team members can find and reuse them without rebuilding filters each time. Aha! saves your view settings, which means one setup effort pays off every time someone opens that view going forward.
Once your views are built and filtered, you're ready to share your aha product roadmap with the people outside your team. This step is where most product teams either build trust with their users or quietly damage it. Sharing the right information at the right time keeps users informed and engaged. Sharing too much, or making promises you can't keep, creates support tickets and frustration you'll spend cycles cleaning up.
Aha! gives you a shareable link for any roadmap view you create. To generate one, open your external-facing view, click the Share button in the top right, and toggle on the public link option. You can also embed the view directly on your website or send it as a standalone URL. Before you flip that switch, confirm your filters are set correctly and that no internal-only items, unscored ideas, or speculative features are visible in that view.
A good external roadmap shows users three things and nothing more:
| Status | What to include | What to exclude |
|---|---|---|
| Planned | Confirmed features tied to a release | Unconfirmed backlog items |
| In Progress | Features actively being built | Internal subtasks or requirements |
| Shipped | Completed features from recent releases | Internal bugs or tech debt |
Publishing a roadmap without filtering it first is the same as sending your internal Slack messages to your entire user base.
Sharing the link alone isn't enough. When you send the roadmap to users, include a short written message that explains what the roadmap is, what it isn't, and how often you'll update it. This prevents users from treating every "Planned" item as a committed ship date.
Here's a template you can adapt and send alongside your roadmap link:
Subject: Here's what we're building next
Hi [first name],
We've just published our product roadmap so you can see what we're working on and what's coming next.
A few things to know:
Thanks for helping us build a better product.
[Your name]
Keep that message short. Users want to know what's coming, not read a product strategy memo. Send it through your regular user communication channel, whether that's email, an in-app notification, or a changelog post.
A published aha product roadmap goes stale faster than most teams expect. Priorities shift, engineering timelines slip, and user needs evolve. If you don't have a structured review process, your roadmap becomes a snapshot of decisions you made months ago rather than a live reflection of what you're actually building. Building a regular cadence turns maintenance from a chore into a quick, repeatable routine.
Set aside 60 minutes at the start of each month specifically for roadmap review. This session should cover three things: updating feature statuses, checking release capacity, and reassessing the top 10 backlog items against your current goals. Keep the agenda tight and consistent so the meeting stays useful rather than expanding into a general planning session.
Use this review checklist each month:
| Review task | What to check | Action if needed |
|---|---|---|
| Feature status updates | Are any "Planned" items now "In Progress" or "Shipped"? | Update status in Aha! |
| Release capacity check | Has scope crept beyond your capacity limit? | Remove or defer lower-scored features |
| Backlog rescoring | Do your top 10 items still align with current goals? | Rescore and reorder as needed |
| Goal progress | Are you on track for your quarterly goals? | Adjust initiatives if you're off track |
| New ideas triage | Have high-vote ideas emerged since last review? | Promote them to features if warranted |
A roadmap you update monthly takes 60 minutes. A roadmap you ignore for a quarter takes 60 hours to untangle.
When priorities shift and features move or get dropped, communicate that change proactively rather than waiting for users to notice the roadmap changed. Write a brief update explaining what moved, why it moved, and what replaced it. Post it through the same channel you used when you first shared the roadmap.
Keep that update short and factual. Users respect honest, direct communication about trade-offs far more than silence or vague language about "shifting priorities." If a feature gets deprioritized because a more impactful request surfaced, say that. It reinforces that your roadmap responds to real user input rather than internal politics, which builds the kind of trust that keeps your feedback portal active and your roadmap credible over time.
Your aha product roadmap lives in Aha!, but your engineering team likely works in Jira, Linear, or another project management tool. Keeping both systems updated manually is a waste of time and a guaranteed source of errors. Aha! supports two-way integrations with the most common development tools, so changes in one system reflect automatically in the other without anyone copying and pasting ticket details.
To set up the Jira integration, go to Settings > Workspace > Integrations inside your Aha! workspace and select Jira from the list. You'll need your Jira site URL, a Jira admin account, and permission to install integrations on both sides. Walk through the configuration wizard and map your Aha! fields to the corresponding Jira fields. The minimum field mappings you need to configure are:
| Aha! field | Maps to Jira field |
|---|---|
| Feature name | Issue summary |
| Description | Issue description |
| Release | Fix version |
| Status | Issue status |
| Effort estimate | Story points |
Once the mapping is saved, you can send any Aha! feature to Jira with a single click using the "Send to Jira" button on the feature detail page. When your engineers update the status in Jira, that change syncs back to Aha! automatically. This keeps your roadmap statuses accurate without requiring your product team to chase engineers for updates.
A two-way sync eliminates the "which system is the source of truth" argument that stalls every planning meeting.
Jira isn't the only tool worth connecting. Aha! also integrates with Slack for notifications, so your team gets a message whenever a feature status changes or a new idea gets promoted. For teams using Salesforce, the integration lets you link customer accounts directly to feature requests, which makes it easier to quantify the revenue impact of each backlog item.
To add any integration beyond Jira, return to Settings > Workspace > Integrations and browse the full list. Each integration follows the same pattern: authenticate, map fields, and set your sync triggers. Start with the tools your team checks every day rather than connecting everything at once. Adding integrations incrementally lets you confirm each one works correctly before layering in the next, which keeps your workspace clean and your data reliable.
Building an aha product roadmap that actually drives decisions takes more than picking a tool and filling in dates. Every step in this guide connects to the next: your goals shape your initiatives, your initiatives give features context, your scores make prioritization defensible, and your review cadence keeps the whole thing honest. Skip any step, and the gaps show up quickly in missed deadlines or a backlog that no longer reflects what users need.
The part most teams underinvest in is the feedback layer that feeds the roadmap. Before any feature reaches Aha!, it needs to come from real, consolidated user input rather than internal assumptions. That's exactly what Koala Feedback handles. It gives you a central place to collect votes, organize requests, and identify what users actually want, so every feature you add to Aha! starts with a solid reason to exist.

Start today and have your feedback portal up and running in minutes.
