Collecting customer feedback determines whether you build features people actually want or waste months on ideas that miss the mark. HubSpot offers built-in survey tools that let you gather insights directly from your customers, and knowing how to use HubSpot customer feedback survey features properly can transform scattered opinions into actionable product decisions.
This guide walks you through the complete process: creating NPS, CSAT, and custom surveys in HubSpot, configuring delivery methods, and turning responses into reports that drive real change. Whether you're running your first feedback campaign or optimizing an existing setup, you'll find step-by-step instructions alongside best practices that actually work.
At Koala Feedback, we help teams collect, organize, and prioritize user feedback to build better products. We've seen firsthand how the right feedback strategy, regardless of which tools you use, separates companies that guess from companies that know. This article gives you everything you need to set up HubSpot's feedback surveys correctly, interpret the data you collect, and create a feedback loop that keeps your customers engaged and your roadmap on track.
HubSpot's survey tools give you the ability to capture customer sentiment at scale while keeping all responses tied to individual contact records in your CRM. You can deploy multiple survey types including Net Promoter Score (NPS), Customer Satisfaction (CSAT), Customer Effort Score (CES), and fully customized surveys that ask specific questions about your product, features, or service experience. Every response becomes part of your customer's history, which means you can track how sentiment changes over time and identify patterns that predict churn or expansion opportunities.
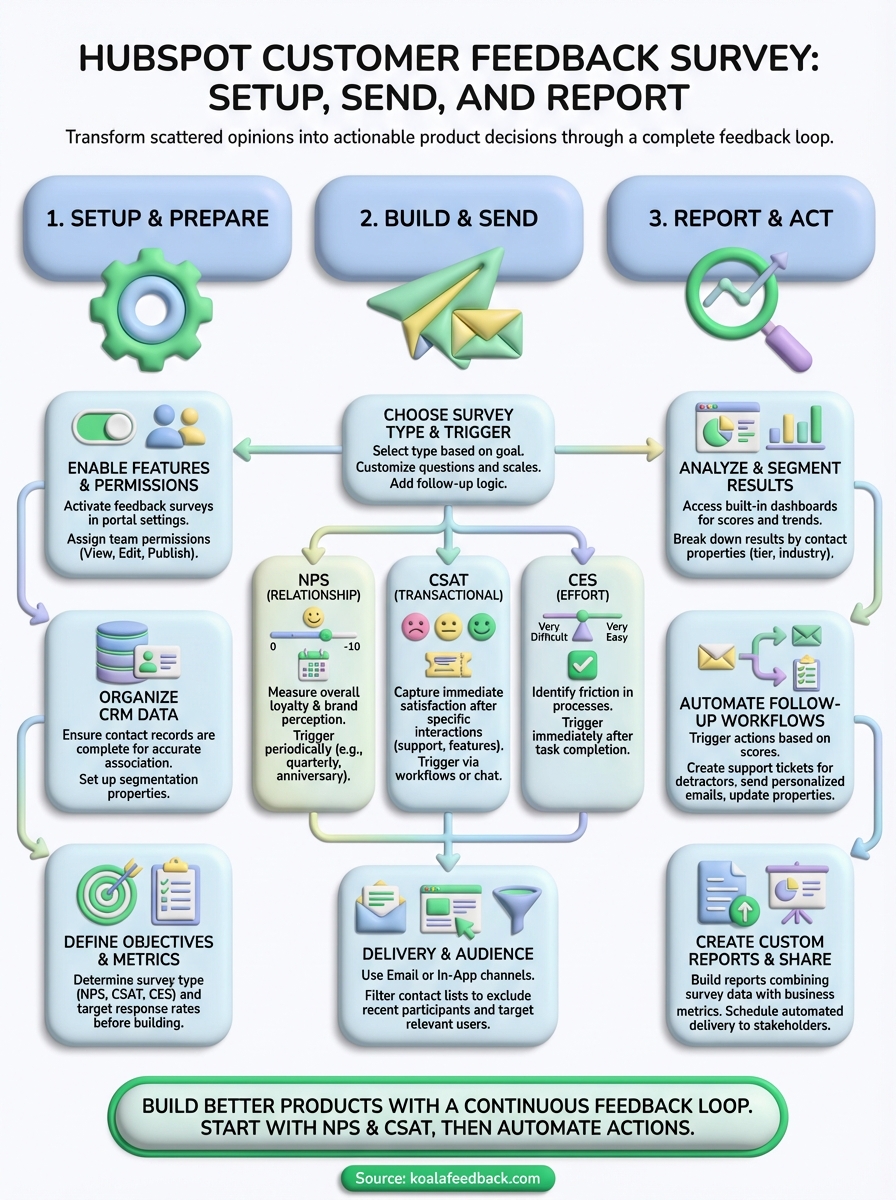
Your HubSpot customer feedback survey system lets you measure different aspects of the customer experience using standardized metrics that benchmark against industry standards. NPS surveys ask customers how likely they are to recommend your product on a 0-10 scale, automatically categorizing responses into promoters, passives, and detractors. CSAT surveys capture immediate reactions to specific interactions like support tickets or feature releases, giving you a quick pulse on whether you met expectations. CES surveys measure how much effort customers had to expend to accomplish their goals, which research shows correlates strongly with loyalty and repeat purchases.
Each survey type serves a different purpose in your feedback strategy. You deploy NPS when you want to understand overall relationship health and brand perception, typically on a quarterly or biannual schedule. CSAT works best for transactional feedback right after a customer completes an important action or receives help from your team. CES helps you identify friction points in your product or process that make customers work harder than they should.
Standardized metrics like NPS and CSAT give you comparable data points, but custom surveys let you ask the specific questions that matter most to your product decisions.
HubSpot allows you to trigger surveys automatically based on customer behavior, contact properties, or workflow conditions rather than sending blanket campaigns to your entire database. You can launch an NPS survey when a contact reaches their 90-day anniversary as a customer, send a CSAT survey immediately after closing a support ticket marked as high priority, or deploy a custom product survey when someone uses a specific feature for the first time. This targeting ensures you catch customers when they have the most relevant experience to share, which increases response rates and improves data quality.
The platform also supports multiple delivery channels including email, in-app pop-ups (when using HubSpot's tracking code), and direct links you can embed in your product interface or share via chat. Email surveys work well for periodic check-ins, while in-app surveys capture feedback from users actively engaged with your product. Direct links give you flexibility to place survey prompts exactly where they make sense in your user experience.
Every survey response in HubSpot writes directly to the contact record that submitted it, creating a complete timeline of customer sentiment alongside purchase history, support tickets, and engagement data. You can view individual responses, see aggregate scores, and filter your contact database by survey answers to create targeted lists. This integration means you can identify all promoters who gave you a 9 or 10 on your NPS survey and immediately ask them for testimonials or referrals. You can also flag detractors who scored you low and trigger outreach workflows to understand their concerns before they churn.
HubSpot's reporting tools let you break down survey results by any contact property in your database, which helps you spot patterns that wouldn't be visible in aggregate numbers. You can compare NPS scores between customers on different pricing tiers, analyze CSAT ratings by the support rep who handled each ticket, or see how product feedback varies between industries you serve. This segmentation turns basic satisfaction scores into actionable insights about which customer segments feel best served and which need attention.
Building a HubSpot customer feedback survey requires more than just clicking through the survey builder. You need specific account permissions, organized contact data, and clear decisions about your feedback strategy before you create your first question. Gathering these prerequisites saves you from rebuilding surveys or discovering limitations halfway through your campaign setup.
Your HubSpot subscription determines which survey types you can create and how you can distribute them. Service Hub Professional and Enterprise tiers include full access to NPS, CSAT, and CES surveys along with custom survey builders. Marketing Hub Professional and Enterprise also support these features if you don't use Service Hub. Starter tier accounts get limited survey functionality that restricts customization options and reporting capabilities.
You need edit access to Marketing or Service Hub tools within your HubSpot portal to build and deploy surveys. Account administrators control these permissions in the user settings, so confirm you have the right access level before starting. If you can create emails or workflows, you likely have sufficient permissions to create surveys.
HubSpot surveys work by associating responses with existing contact records in your CRM, which means you need contacts loaded into your database before sending surveys. Each survey recipient must have at minimum an email address on their contact record. The platform cannot survey people who don't exist in your contact database, and responses from unknown contacts get discarded unless you enable anonymous submission (which disconnects responses from CRM data).
Your contact properties should include segmentation fields that help you analyze survey results by customer attributes. Add properties for customer tier, signup date, product usage level, or industry before launching surveys so you can filter responses by these dimensions. Without proper contact properties in place, you'll collect feedback but lack the context needed to understand which customer segments feel satisfied versus frustrated.
Contact property setup directly determines how granular your survey analysis can be, so invest time organizing your CRM structure before launching feedback campaigns.
Decide which specific questions you need answered and what success looks like before opening the survey builder. Writing down your survey goal prevents scope creep that leads to overly long questionnaires with poor completion rates. If you want to measure overall loyalty, use NPS. If you need to know whether customers feel your product delivers value, design a custom survey with targeted questions about specific features or outcomes.
Determine your target response rate and sample size based on your contact database size and how confident you want to be in the results. A database of 1,000 customers needs roughly 278 responses to achieve 95% confidence with a 5% margin of error. Smaller databases require higher response rates to reach statistical significance.
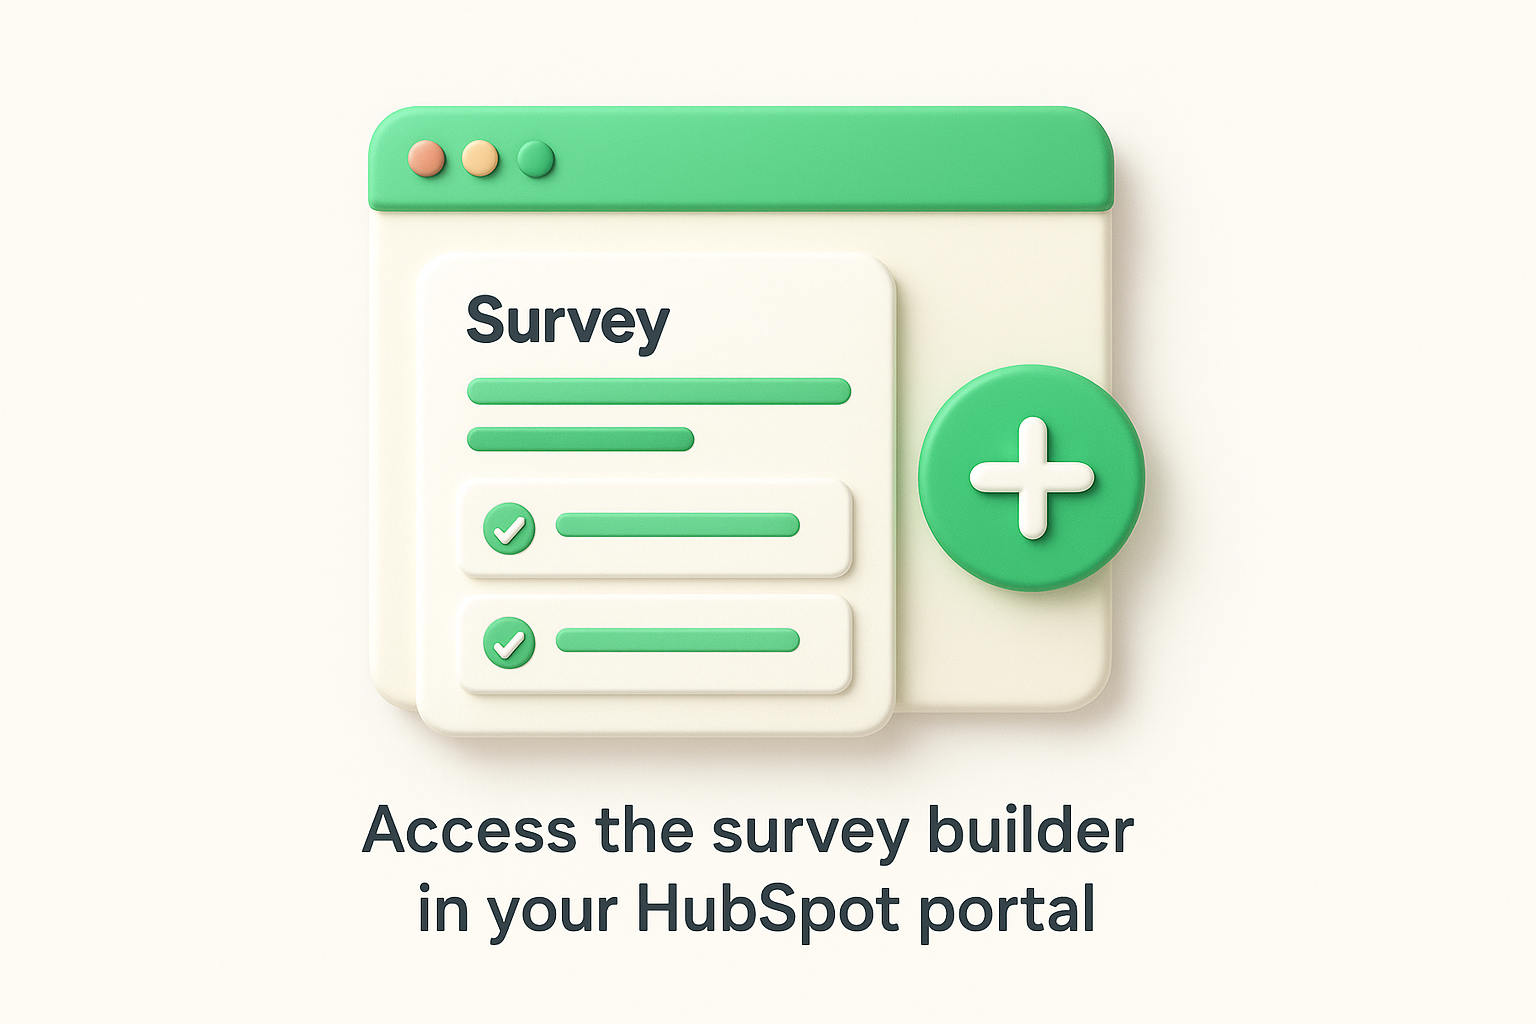
Your HubSpot customer feedback survey tools live within Service Hub or Marketing Hub, depending on your subscription configuration. Before you create your first survey, you need to enable the feedback features in your portal settings and assign the correct permissions to team members who will build, send, and analyze survey responses. This initial setup takes about 10 minutes but prevents access issues and ensures everyone on your team can collaborate on feedback campaigns.
Navigate to Service > Feedback Surveys in your main HubSpot navigation menu to reach the survey dashboard. Marketing Hub users find this option under Marketing > Lead Capture > Feedback Surveys instead. The dashboard displays all existing surveys with their status, response counts, and average scores. Click the Create survey button in the top right corner to open the survey builder interface where you select your survey type and begin configuration.
Your first visit to this section may prompt you to enable feedback surveys for your portal if the feature hasn't been activated yet. HubSpot walks you through a quick setup wizard that connects survey functionality to your CRM data structure and establishes default settings for response handling.
HubSpot controls survey access through user permissions that you manage in Settings > Users & Teams. Users need specific permission sets to create, edit, send, or view survey results. Navigate to the individual user's profile, select Edit permissions, and enable access under the Service Hub or Marketing Hub section depending on where your surveys live in your portal structure.
The permission levels you can assign include View Only, which lets team members see survey results but not modify campaigns, Edit, which allows full survey creation and configuration rights, and Publish, which permits sending surveys to contacts. Customer support representatives typically need View Only access to reference survey feedback during support interactions, while product managers require Edit and Publish permissions to design and deploy new surveys.
Restricting survey creation permissions to a small team prevents duplicate or conflicting survey campaigns that confuse customers and dilute response quality.
Open Settings > Service > Feedback Surveys to configure default behaviors that apply across all surveys in your portal. Enable anonymous submission if you want to collect feedback from contacts without requiring them to log in or identify themselves, though this prevents HubSpot from associating responses with contact records. Turn on notification emails to alert team members when new responses arrive, and configure which users receive these alerts based on survey type or contact owner.
Set your default branding in this section by uploading your logo and selecting brand colors that automatically apply to new surveys. Configure response handling rules that determine what happens after someone completes a survey, such as displaying a thank you message or redirecting to a specific URL on your website.
Net Promoter Score surveys measure customer loyalty by asking how likely someone is to recommend your product or service on a scale from 0 to 10. Your HubSpot customer feedback survey for NPS automatically calculates your score by subtracting the percentage of detractors (0-6 ratings) from the percentage of promoters (9-10 ratings), giving you a number between -100 and +100 that benchmarks against industry standards. You deploy NPS surveys to understand overall relationship health rather than reactions to specific interactions, which makes them ideal for quarterly check-ins or milestone moments like annual renewals.
Click Create survey from your feedback dashboard and choose Net Promoter Score (NPS) from the available survey types. HubSpot loads the standard NPS question template automatically, which saves you from writing the core question yourself. Name your survey with a clear identifier like "Q1 2026 NPS Survey" or "90-Day Customer NPS" that indicates when and why you're collecting this feedback. This naming convention helps you track campaigns over time and avoid confusion when analyzing historical data.
HubSpot pre-fills the NPS question as "How likely are you to recommend [Your Company] to a friend or colleague?" but you can customize the company name or adjust the phrasing to fit your product context. Leave the 0-10 rating scale unchanged because modifying it breaks the standardized NPS methodology that allows industry comparisons. The survey builder automatically associates ratings 0-6 as detractors, 7-8 as passives, and 9-10 as promoters without requiring manual configuration.
The standard NPS question format has been validated across millions of surveys, so resist the temptation to rewrite it unless you have a specific reason that outweighs losing benchmark comparability.
Click Add question below the NPS rating to include an open-ended follow-up that asks "What is the primary reason for your score?" This qualitative feedback transforms your numeric score into actionable product insights by revealing specific features, pain points, or experiences that drove each rating. Configure this question to display conditionally based on score ranges so promoters explain what they love while detractors describe what needs fixing.
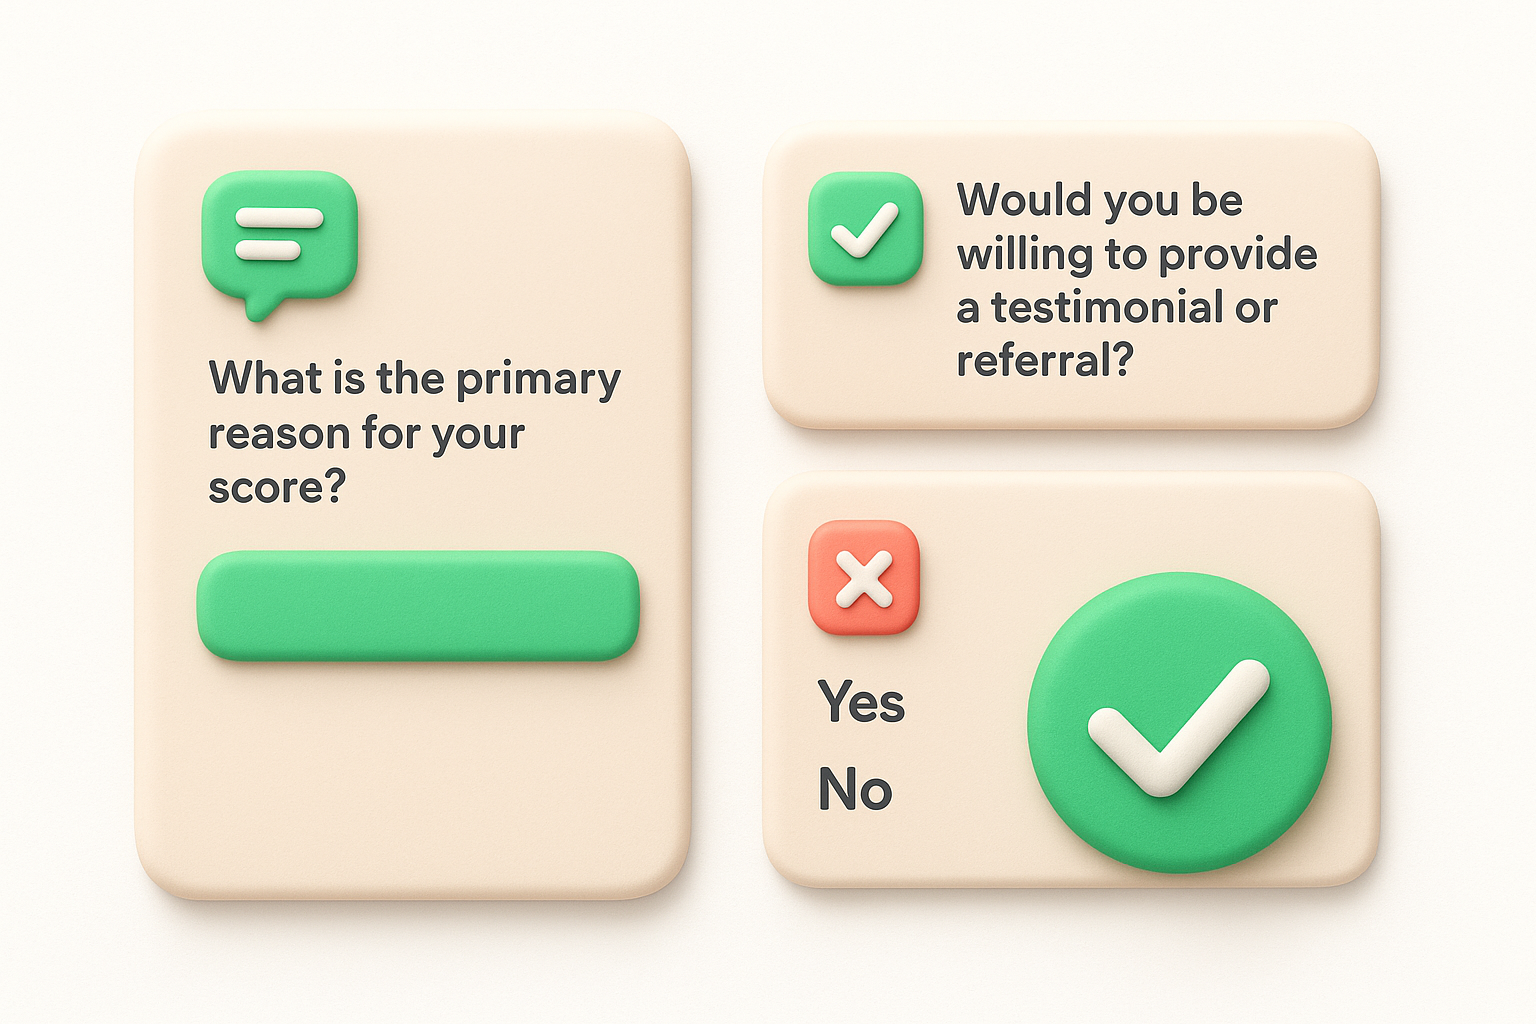
Add a second follow-up question for promoters only that asks "Would you be willing to provide a testimonial or referral?" with Yes/No answer options. This question identifies your most engaged advocates and creates a natural next step for your sales or marketing team to request case studies or customer references. Set these follow-up questions as optional rather than required to maximize survey completion rates while still collecting valuable context from customers who want to elaborate.
Customer Satisfaction surveys measure immediate reactions to specific interactions like support ticket resolutions or live chat conversations. Your HubSpot customer feedback survey for CSAT asks customers to rate their experience on a simple scale immediately after an interaction concludes, capturing sentiment while the experience remains fresh in their minds. CSAT surveys work best when sent within minutes of completing a support interaction rather than days later, which gives you real-time feedback on your team's performance and helps you identify service quality issues before they compound into larger problems.
Navigate to Service > Feedback Surveys and click Create survey, then choose Customer Satisfaction (CSAT) from the available types. Name your survey with descriptors that indicate the trigger event and channel, such as "Ticket Resolution CSAT" or "Chat Conversation CSAT" to distinguish between different survey deployments. HubSpot loads a default satisfaction question template but allows customization to match your brand voice and specific interaction context.
The standard CSAT question asks "How would you rate your overall satisfaction with the service you received?" with a five-point scale ranging from Very Unsatisfied to Very Satisfied. You can modify this question to reference specific aspects of your service like "How satisfied are you with the resolution of your support ticket?" or "How would you rate your chat experience with our team today?" Choose between numerical scales (1-5 or 1-10) or emoji-based satisfaction faces depending on your brand personality and customer preferences.
Add a follow-up question that asks "What could we have done better?" which captures specific improvement suggestions from unsatisfied customers. Configure this question to appear only when someone selects ratings below your satisfaction threshold, typically scores of 3 or lower on a five-point scale. This targeted approach respects the time of satisfied customers while extracting detailed feedback from those who had poor experiences.
Asking for specific improvement suggestions from dissatisfied customers transforms vague negative ratings into actionable coaching opportunities for your support team.
Open the Automations tab within your CSAT survey settings and enable automatic sending when ticket status changes to Closed. Configure the delay timer to send surveys 2 hours after ticket closure, giving customers time to test the solution before rating their experience. Set survey recipients to the contact associated with each ticket rather than the ticket requester email to maintain accurate CRM data linkage.
Add workflow conditions that exclude certain ticket types from automatic surveys, such as spam tickets or tickets closed without customer interaction. Filter out tickets that remained open for less than 5 minutes to avoid surveying customers about trivial issues that don't require meaningful support effort.
Enable CSAT surveys in your live chat settings by navigating to Conversations > Chatflows and editing your existing chat widget. Scroll to the post-chat experience section and toggle on End of conversation survey. Configure the survey to display immediately when a chat agent marks the conversation as closed, presenting a quick satisfaction rating before the customer navigates away from your site.
Customize the chat survey to use a simplified three-point scale (Satisfied, Neutral, Unsatisfied) instead of five points to reduce friction in the chat interface where screen space is limited. Add one optional text field asking "Anything else we should know?" rather than multiple follow-up questions that might feel burdensome in a chat context.
Customer Effort Score surveys measure how much work customers had to do to accomplish their goal, whether that's resolving a support issue, completing a purchase, or using a product feature. Your HubSpot customer feedback survey for CES asks customers to rate the ease of their experience on a scale that reveals friction points in your processes. Companies that reduce customer effort see higher loyalty and repeat business because people naturally prefer experiences that require less work, making CES a powerful predictor of future behavior that complements satisfaction metrics.
Navigate to Service > Feedback Surveys and click Create survey, then choose Customer Effort Score (CES) from the survey type options. Name your survey with descriptors that reference the specific action or process you're measuring, such as "Onboarding Effort Survey" or "Feature Setup CES" to track different customer journeys separately. HubSpot provides a default CES question template that asks customers to rate the ease of their experience, but you should customize this question to reference the exact task they just completed.
The standard CES question format uses a seven-point scale from "Very Difficult" to "Very Easy" with "Neutral" in the middle. Configure your question to read "How easy was it to [specific action]?" rather than generic phrasing about overall experience. Replace the bracketed text with specific descriptions like "get your issue resolved," "set up your account," or "find the feature you needed" depending on which customer journey you're measuring.
Referencing the specific task in your CES question produces more accurate ratings because customers evaluate the precise experience they just completed rather than their general feelings about your company.
Click Add question below the effort rating and include an open-ended follow-up that asks "What made this experience difficult?" with conditional logic to display only when someone selects ratings of 4 or lower on your seven-point scale. This question captures specific obstacles that created friction during the customer's journey, turning vague effort scores into actionable process improvements. Add a second conditional question for high scorers asking "What made this easy for you?" to identify which parts of your process work well and should be protected during future changes.
Open the Automations tab and set your CES survey to trigger immediately after specific workflow stages complete, such as when a customer finishes onboarding tasks or when your system logs a product feature usage event. Set the timing delay to zero minutes for CES surveys because effort perception degrades quickly as time passes, and customers forget the details of their experience. Configure recipient filters to exclude contacts who have received any survey in the past 7 days to prevent survey fatigue while maintaining data freshness.
Custom surveys let you ask specific questions about your product features, onboarding experience, or customer lifecycle stages that standard NPS, CSAT, and CES templates cannot address. Your HubSpot customer feedback survey builder includes a custom survey option that supports multiple question types, conditional logic, and flexible answer formats to capture exactly the feedback you need for product decisions. You deploy custom surveys when you need targeted insights about feature usage, pricing perception, competitive comparisons, or any topic that requires questions beyond standardized satisfaction scales.
Navigate to Service > Feedback Surveys and click Create survey, then select Custom feedback survey from the type options. Use custom surveys when you need to validate feature requests before development, understand why customers abandon specific workflows, or measure awareness of new capabilities you recently launched. Name your survey with descriptors that indicate the feedback topic like "Q1 Feature Prioritization Survey" or "Checkout Process Feedback" to distinguish it from relationship health surveys.
Custom surveys work best for one-time research projects or seasonal campaigns rather than ongoing monitoring. Deploy them when you need to answer specific product questions, then retire the survey once you collect sufficient responses rather than running it continuously alongside your NPS and CSAT programs.
Add your first question by clicking Add question and select from question types including multiple choice, single select, dropdown, text input, or rating scales. Create a multiple choice question asking "Which features do you use most frequently?" with checkboxes that let customers select all applicable options from your feature list. Follow with a rating scale question like "How important is [Feature Name] to your workflow?" using a five-point scale from Not Important to Critical.
Configure answer options for each question by typing choices directly into the survey builder. Add an Other (please specify) option with a text field to capture responses you did not anticipate. Set questions as required or optional based on whether you need answers from every respondent to make your analysis valid.
Multiple question types within a single survey reveal not just what customers think but why they think it and which alternatives they prefer.
Enable branching logic by clicking the conditional rules icon next to any question and selecting "Show this question only if" from the options. Configure conditions like "Show pricing feedback question only if customer selected 'Plan Upgrade' as their primary goal" to avoid asking irrelevant questions that increase abandonment rates. Chain multiple conditions together using AND/OR operators to create sophisticated survey flows that adapt to each respondent's previous answers.
Add a final open-ended question asking "What should we build next?" that appears for all respondents regardless of previous answers, giving everyone an opportunity to share unsolicited feedback that might reveal needs you had not considered when designing earlier questions.
Your delivery channel, timing, and audience selection determine whether customers actually complete your surveys or ignore them entirely. Sending a HubSpot customer feedback survey through the wrong channel at the wrong time to the wrong people produces low response rates and biased data that leads to poor product decisions. You need to match each survey type to appropriate delivery methods, trigger surveys when customers have relevant experiences fresh in their minds, and filter your contact lists to exclude people who lack the context needed to provide useful feedback.
Email works best for NPS and custom surveys that customers can complete on their own schedule rather than during active product usage. Configure email surveys to send from a recognized sender name like your support team or CEO rather than a no-reply address, which increases open rates and signals that you value responses. Include the first survey question directly in the email body rather than forcing clicks to external pages, which reduces friction and improves completion rates by 30-40% compared to link-only approaches.
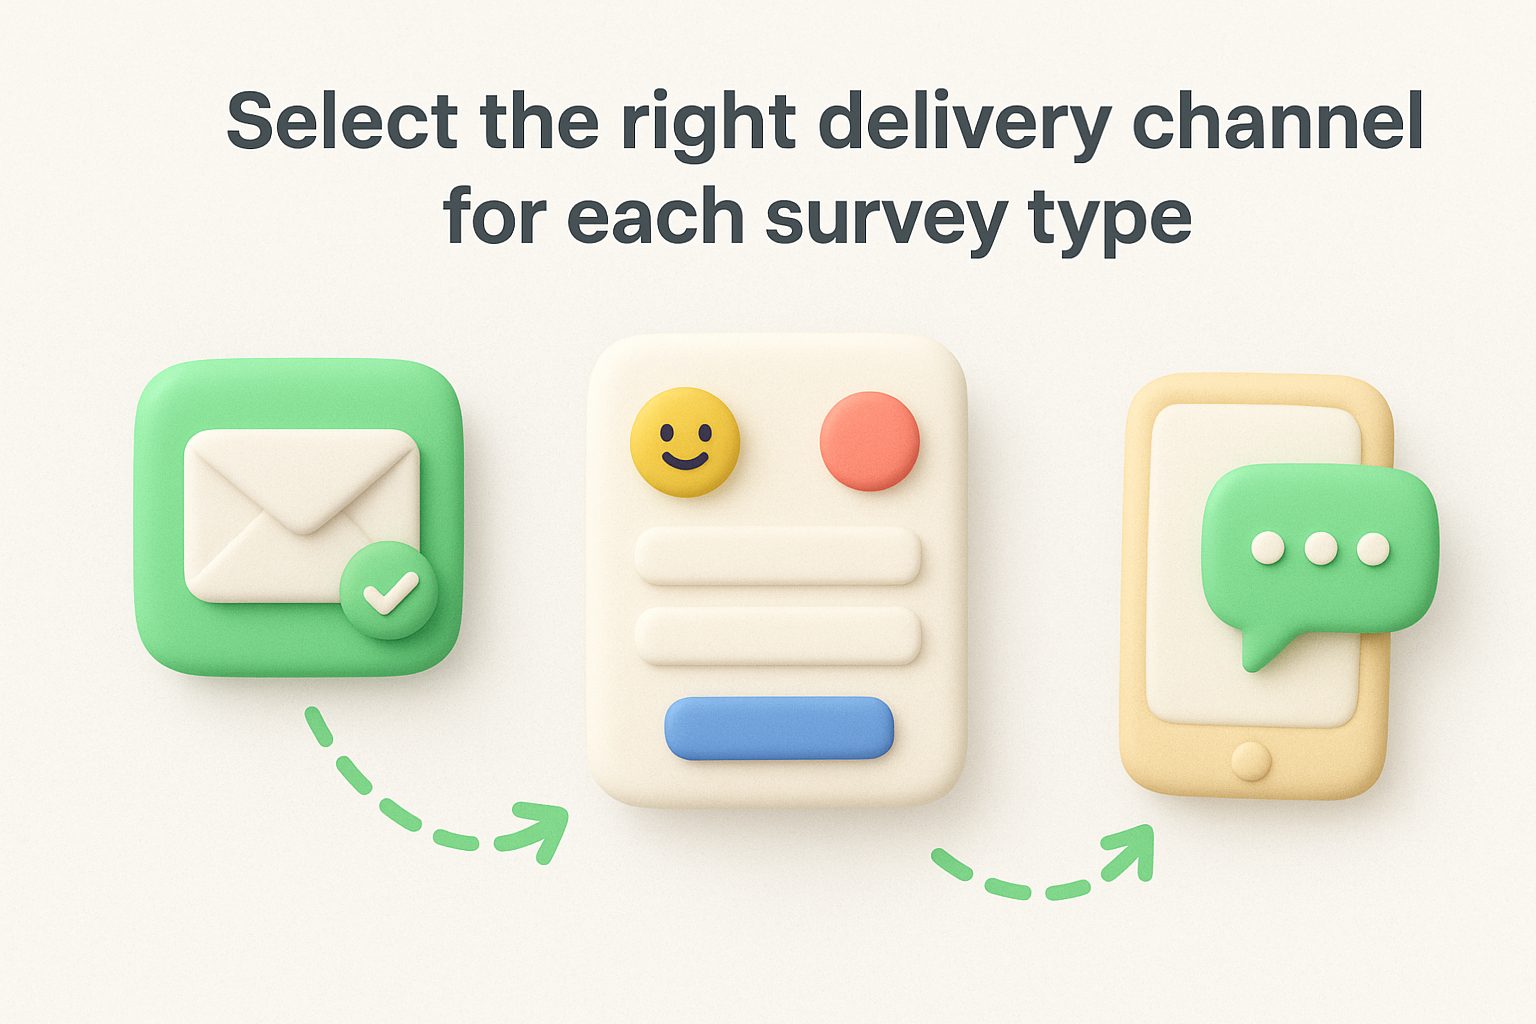
In-app surveys capture feedback during active product sessions when customers experience the specific feature or workflow you want feedback about. Install HubSpot's tracking code on your product pages to enable in-app survey delivery through pop-up modals or slide-in panels. Set display triggers based on specific page URLs or tracked events like button clicks to ensure surveys appear at relevant moments rather than interrupting unrelated tasks.
Matching survey channels to customer context produces response rates 2-3 times higher than generic email blasts because you ask for feedback when the experience remains fresh.
Configure automatic delays between trigger events and survey delivery to catch customers after they complete tasks but before they forget details. Send CSAT surveys 2 hours after ticket closure to allow time for customers to verify solutions work without waiting so long that they forget their support experience. Deploy NPS surveys on 30-day, 90-day, or annual intervals measured from signup date or contract renewal to track relationship changes at consistent lifecycle stages.
Avoid sending surveys during high-stress periods like immediately after billing errors or service outages when emotional reactions distort genuine feedback. Add workflow conditions that pause survey delivery for contacts with recent negative interactions or open critical tickets until those situations resolve.
Build contact lists that exclude recent survey participants to prevent fatigue that degrades response quality and annoys customers. Set suppression rules that block surveys to anyone who received any feedback request in the past 14-30 days depending on your total survey volume and customer base size. Remove contacts who marked previous surveys as spam or unsubscribed from feedback emails.
Filter surveys to customers who have sufficient product experience to form valid opinions by requiring minimum usage thresholds like 10 login sessions, 30 days since signup, or completion of key onboarding milestones. Exclude trial users from NPS surveys measuring long-term loyalty but include them in onboarding-specific custom surveys about their early experience.
Survey responses lose their value when they sit unread in reports instead of triggering immediate action from your team. Your HubSpot customer feedback survey platform includes workflow automation that converts survey responses into automatic follow-up tasks, ticket creation, email sequences, and contact property updates within seconds of submission. Connecting workflows to survey data ensures that every detractor gets outreach before they churn, every promoter receives a request for testimonials, and your team receives alerts about critical feedback without manually checking survey dashboards multiple times per day.
Navigate to Automation > Workflows and click Create workflow to build response-triggered automation. Select Contact-based workflow as your type, then set your enrollment trigger to "Contact participated in survey" and choose your specific survey name from the dropdown. Add a second trigger condition filtering for survey score ranges like "NPS score is less than or equal to 6" to isolate detractors who need immediate attention or "CSAT score is greater than or equal to 4" to identify satisfied customers ready for upsell conversations.
Configure different workflow branches that execute distinct actions based on score thresholds. Build one branch that creates internal tasks for your success team when NPS scores fall below 7, another branch that sends thank you emails to promoters who score 9 or 10, and a third that updates contact properties to flag passives for future re-engagement campaigns. Set workflow delays between actions to space outreach appropriately rather than overwhelming contacts with simultaneous communications.
Add a Create ticket action within your detractor workflow branch to generate support tickets automatically when someone submits a low satisfaction score. Configure the ticket properties to include the survey response text in the description field by inserting the personalization token for your survey's open-ended question, which gives your support rep full context without requiring them to look up the original survey. Set the ticket priority to High and assign it to the contact owner listed on the customer's record, or route it to a dedicated customer recovery queue if your team structure supports specialized retention efforts.
Automatic ticket creation for low scores converts passive feedback collection into active intervention, cutting response time from days to minutes.
Configure Send email actions that deliver personalized follow-up messages matching the sentiment each customer expressed. Build a template for promoters that requests a testimonial or case study participation, including specific questions about which features they value most and how your product improved their workflow. Create a different email for detractors that apologizes for their poor experience, explains the steps you are taking to address their concerns, and offers direct calendar access to schedule a call with your success team.
Add workflow if/then branches that customize email content based on specific survey answers rather than just scores. Insert personalization tokens that reference the exact features or pain points customers mentioned in open-ended responses, which demonstrates you actually read their feedback instead of sending generic templates.
Your survey data transforms into product decisions only when you can analyze it effectively and share insights with stakeholders who need them. HubSpot provides built-in reporting dashboards that display response rates, average scores, and trend lines for each HubSpot customer feedback survey you deploy, plus segmentation tools that break down results by customer attributes stored in your CRM. You access these reporting features immediately after collecting responses rather than waiting for manual analysis or exporting data to spreadsheets, which accelerates the feedback loop between customer input and team action.
Navigate to Service > Feedback Surveys or Marketing > Lead Capture > Feedback Surveys depending on your hub configuration, then click the name of any active or completed survey to open its dedicated dashboard. The overview screen displays your response rate percentage, total number of submissions, and your calculated score (NPS, CSAT, or CES) along with a trend chart showing how that score changed over time. Scroll down to view individual responses in chronological order with the contact name, submission date, rating, and any open-ended feedback they provided.

Click the Analyze tab to access deeper metrics including response distribution charts that show how many customers selected each rating option. Track your promoter, passive, and detractor percentages for NPS surveys or view satisfaction distribution across your CSAT scale. Set custom date ranges to compare performance between quarters or analyze how scores changed after major product releases.
Filter your survey dashboard using contact properties to identify patterns within customer segments that aggregate scores might hide. Click the filter icon and select properties like customer tier, industry, signup date, or assigned sales rep to break down responses by these dimensions. Compare NPS scores between enterprise and small business customers, or analyze whether customers who signed up in the past 90 days rate you differently than long-term users.
Create saved filters for segments you analyze regularly by clicking Save after configuring your property combinations. Build filters for customers at risk of churn (low CSAT scores + high support ticket volume), expansion candidates (high NPS + low product usage), or specific product lines where you need targeted feedback.
Segmenting survey results by customer properties reveals which groups drive your overall scores and where targeted improvements deliver the biggest impact.
Build custom reports by navigating to Reports > Custom Reports and selecting survey properties as your data source. Drag Survey Name into your report configuration along with response metrics, contact properties, and CRM data like revenue or support ticket counts. Create visualizations that combine survey scores with business outcomes to demonstrate how satisfaction correlates with retention rates or expansion revenue.
Configure automated report delivery by clicking Actions > Schedule report within your custom report and selecting recipients, frequency, and file format. Send weekly NPS reports to your executive team, monthly CSAT breakdowns to support managers, or quarterly product feedback summaries to your engineering leads.
Export survey responses by opening any survey dashboard and clicking Export in the top right corner, which generates a CSV file containing all responses with associated contact properties. Use this export to analyze feedback in external tools, combine HubSpot data with usage analytics from your product database, or share raw responses with teams who lack HubSpot access.
Connect survey data to external business intelligence platforms using HubSpot's API or native integrations with tools like Power BI or Tableau if your organization maintains centralized data warehouses. Configure automated data syncs that pull survey responses into your analytics stack daily rather than relying on manual exports.
You now have a complete blueprint for collecting customer feedback through HubSpot's survey tools. Start by building one NPS survey for your active customers, then add CSAT surveys to your support ticket workflow within the next two weeks. This phased approach prevents overwhelming your team with data while you build processes for acting on responses.
Set up basic workflow automation to flag detractors immediately and create tasks for your success team before launching any surveys to your full contact list. Focus your first analysis on identifying the top three friction points customers mention most frequently, then schedule meetings with your product and support teams to address these issues within 30 days.
Once you establish a rhythm for collecting and acting on feedback in HubSpot, consider how you organize feature requests and communicate your roadmap. Koala Feedback helps you centralize user feedback from all sources, prioritize features based on customer votes, and share transparent product roadmaps that keep customers engaged between survey campaigns.

Start today and have your feedback portal up and running in minutes.
