The Aha Ideas portal is a feature within the Aha! product suite that lets teams collect customer feedback, track feature requests, and share product roadmaps, all from a single hub. If you're a product manager or SaaS founder trying to get it up and running, the setup process involves a few specific configuration steps that aren't always obvious at first glance.
This guide walks you through how to set up your Ideas portal from scratch, customize its appearance and workflows, and manage incoming feedback effectively. You'll also learn how to handle common issues like access permissions and user login troubleshooting, so nothing slows your team down.
At Koala Feedback, we build tools in this same space, helping teams capture feedback, prioritize features, and share public roadmaps. That hands-on experience gives us a practical perspective on what matters most when configuring a feedback portal. Whether you're evaluating Aha! or just need a clear walkthrough, this article gives you everything you need to get started.
The Aha! Ideas portal is a dedicated web-based hub where your customers submit feature requests, vote on ideas from other users, and track the status of their submissions over time. It lives inside the Aha! product suite and connects directly to your roadmap workflow, meaning ideas that gain enough traction can move into active planning without any manual hand-off between tools.
When feedback is scattered across email, Slack, and support tickets, the strongest ideas get lost. A portal centralizes that signal in one place.
You should reach for the aha ideas portal when your team receives a consistent stream of requests but has no structured way to capture or rank them. If your support staff fields the same feature requests week after week, or your product managers are making prioritization calls without real data on what users want, a portal gives you the infrastructure to fix that.
The portal fits teams that already have some product process in place. If you are a solo founder with fewer than a dozen active users, the setup overhead may not pay off yet. It becomes most valuable once you have enough feedback volume to genuinely need a system to sort through it.
Aha! bundles several components into the Ideas portal by default. Knowing what you get before you start configuration helps you plan your workflow more intentionally.
| Feature | What it does |
|---|---|
| Idea submission form | Collects requests from users via a public or gated portal |
| Voting | Lets users upvote ideas to signal relative priority |
| Status updates | Notifies users automatically when an idea's status changes |
| Idea merging | Combines duplicate submissions into a single record |
Start in Aha! Account Settings by navigating to Ideas and selecting your portal. This is where you control the foundational settings that determine who can access and interact with your portal before you touch any design or workflow elements.
Your first decision is whether the aha ideas portal will be public or private. A public portal lets anyone submit and vote without logging in, while a private portal requires users to authenticate first, giving you tighter control over who participates.
If your product serves a broad consumer audience, start with a public portal. If you serve enterprise clients with confidentiality requirements, go private from the start.
Once you pick a visibility type, configure portal roles for your internal team. Aha! offers three access levels: viewer, contributor, and owner. Assign the contributor role to product managers who need to triage and merge ideas, and reserve owner access for whoever manages portal settings long-term.
| Role | What they can do |
|---|---|
| Viewer | Read-only access to submitted ideas |
| Contributor | Triage, merge, and update idea statuses |
| Owner | Full control over portal settings and permissions |
Once your access settings are in place, move to the portal appearance editor. This is where you shape how the aha ideas portal looks and feels to users, and the changes you make here directly affect whether people trust the portal enough to submit their ideas.
Navigate to Ideas > Portal Settings > Branding to upload your logo, set a custom domain, and adjust your color scheme. Aha! lets you apply a hex color code directly, so use your primary brand color to keep the experience consistent with your main product.
A portal that looks like a generic tool gets fewer submissions than one that feels like a natural extension of your product.
Rename default labels like "Ideas" to match your team's language. If your users say "requests" or "features," use that language throughout the portal. You can edit these terms under Portal Settings > Terminology.
For submission fields, add custom fields to capture exactly what your team needs at intake:
With your branding in place, the next step is building a workflow that handles ideas the moment they arrive. The aha ideas portal generates more value when you have a clear process for what happens to each submission after it lands in your queue.
Set a default idea status of "Under Review" so every new submission enters a consistent starting point. In Ideas > Workflow Settings, map out which statuses an idea passes through before it reaches your roadmap. A simple three-stage flow works well for most teams:
Aha! flags potential duplicates automatically when a new idea closely matches an existing one. When you spot a duplicate, open both records and use the Merge Ideas option to consolidate them. This keeps your vote counts accurate and prevents your team from reviewing the same request twice.
Merge duplicates early. Letting them accumulate makes your vote data unreliable and your prioritization decisions weaker.
Assign a dedicated triage reviewer on your team to process new submissions daily so nothing sits unreviewed for more than 24 hours.
The aha ideas portal gives you tools to surface the most-requested features and keep users informed as those requests move through your workflow. Getting these settings right means users stay engaged instead of submitting ideas and never hearing back.
Navigate to Ideas > Portal Settings > Voting to set a vote limit per user. Capping votes at five to ten per user forces users to prioritize, which gives you cleaner signal on which ideas matter most. You can also restrict voting to authenticated users only, which prevents vote manipulation from anonymous traffic.
A tight vote limit produces more meaningful data than unlimited voting, where a single motivated user can skew your rankings.
When you change an idea's status, Aha! can automatically notify every user who voted on or submitted that idea. Enable this under Ideas > Notifications > Status Change Alerts. Write a short, direct message for each status transition so users understand exactly what the change means for their request.
| Status transition | Notification message example |
|---|---|
| Under Review > Accepted | "We've added your idea to our roadmap." |
| Accepted > Shipped | "This feature is now live in the product." |
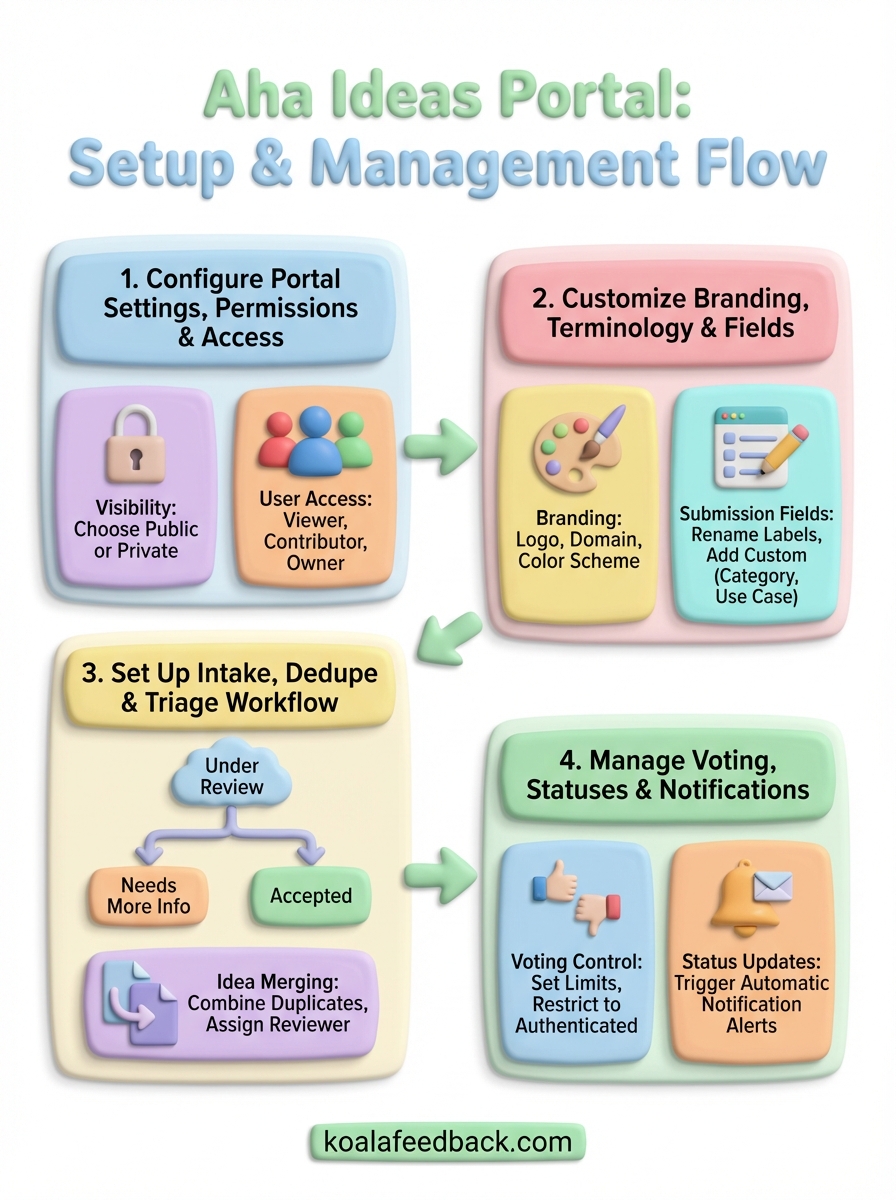
Setting up the aha ideas portal comes down to four focused steps: configure access permissions, customize your branding and fields, build a triage workflow, and manage voting with status notifications. Each step builds on the last, so skipping one tends to create problems down the line. If you follow the order in this guide, you'll have a portal your team can actually work with, not just a form that collects dust.
Your next move is to test the portal as an end user before you invite customers in. Submit a few test ideas, vote on them, and trigger a status change to confirm notifications send correctly. Fix anything that feels unclear from a user perspective.
If you want a simpler alternative that gets you collecting and prioritizing feedback without a lengthy setup process, take a look at Koala Feedback. It covers the core workflow with less overhead.

Start today and have your feedback portal up and running in minutes.
