Managing user feedback without a system leads to missed opportunities and frustrated customers. A Trello feature request board offers a straightforward way to collect and organize feature ideas from your users in one place.
Trello's flexibility makes it a popular choice for teams just getting started with feedback management. You can create columns, add cards, and let users vote, all within a tool many teams already use. But setting it up effectively requires some planning to avoid a messy, hard-to-navigate board that creates more problems than it solves.
This guide walks you through creating a functional feature request board in Trello, step by step. We'll also discuss when Trello works well for this purpose and when you might need a dedicated feedback tool like Koala Feedback to handle growing volumes of user input, automatic deduplication, and more advanced prioritization features.
Before you create your Trello feature request board, you need to answer a few fundamental questions about how you'll use it. These decisions shape your board structure and determine whether it becomes a helpful tool or a source of confusion for your team and users.
You must decide whether your board will be public or private. A public board allows anyone with the link to view feature requests and potentially add their own, which increases transparency and encourages user engagement. Private boards restrict access to team members only, giving you more control but limiting direct user participation.
Consider who should have permission to create cards and vote. Some teams let anyone submit requests directly to Trello, while others prefer users to submit through a form or email that the team then converts into cards. Your choice depends on how much moderation you want to handle and how technical your user base is.
The visibility and permission settings you choose will directly affect how much noise you have to filter and how engaged your users feel in the process.
Determine your categorization system before you start adding cards. You can organize requests by product area (like "Mobile App" or "Dashboard"), by type (like "Bug Fix" or "New Feature"), or by customer segment (like "Enterprise" or "Startup").
Labels work well for categories in Trello, but you need to define them upfront. Creating too many categories makes the board difficult to navigate, while too few makes it hard to filter requests. Start with four to six broad categories that cover your main product areas or request types.
Your workflow stages become list columns in Trello. Most teams need at least four stages: Submitted, Under Review, Planned, and Completed. You might also want stages like "Not Planned" or "Need More Info" depending on how you handle rejected requests.
Think about how requests move between stages. Will you manually drag cards, or will you create automation rules using Trello's Butler feature? Manual movement gives you more control but requires more time, while automation speeds things up but might move cards prematurely.
The number of stages affects how much visibility users have into your process. Too many stages overwhelm people trying to understand where their request stands. Three to five stages provide enough detail without creating confusion about progress tracking.
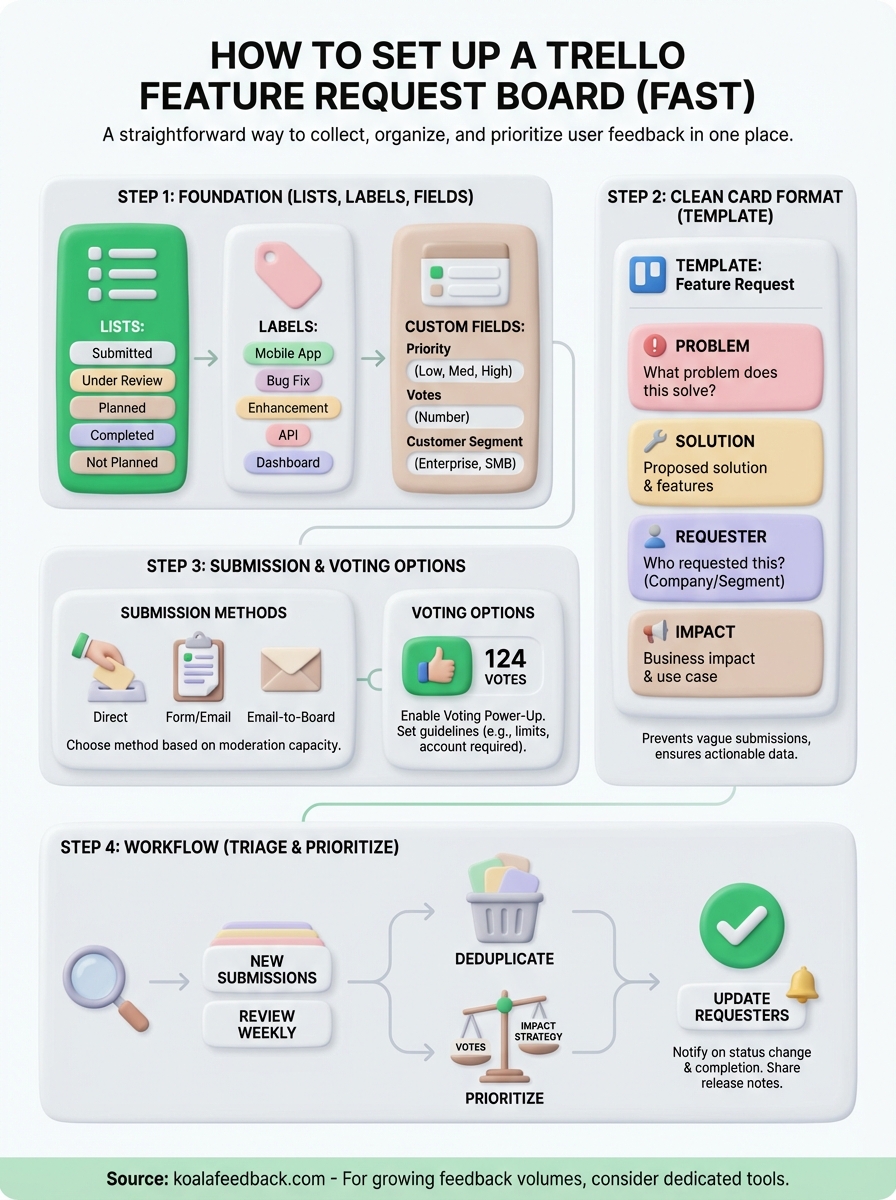
Your Trello feature request board needs a solid foundation before users start submitting requests. Start by creating your workflow stages as list columns, then add labels and custom fields to organize information consistently across all cards.
Create a new Trello board and add lists that represent your workflow stages. Click "Add a list" on the right side of the board and name each stage clearly. For a basic feature request board, you need these four lists:
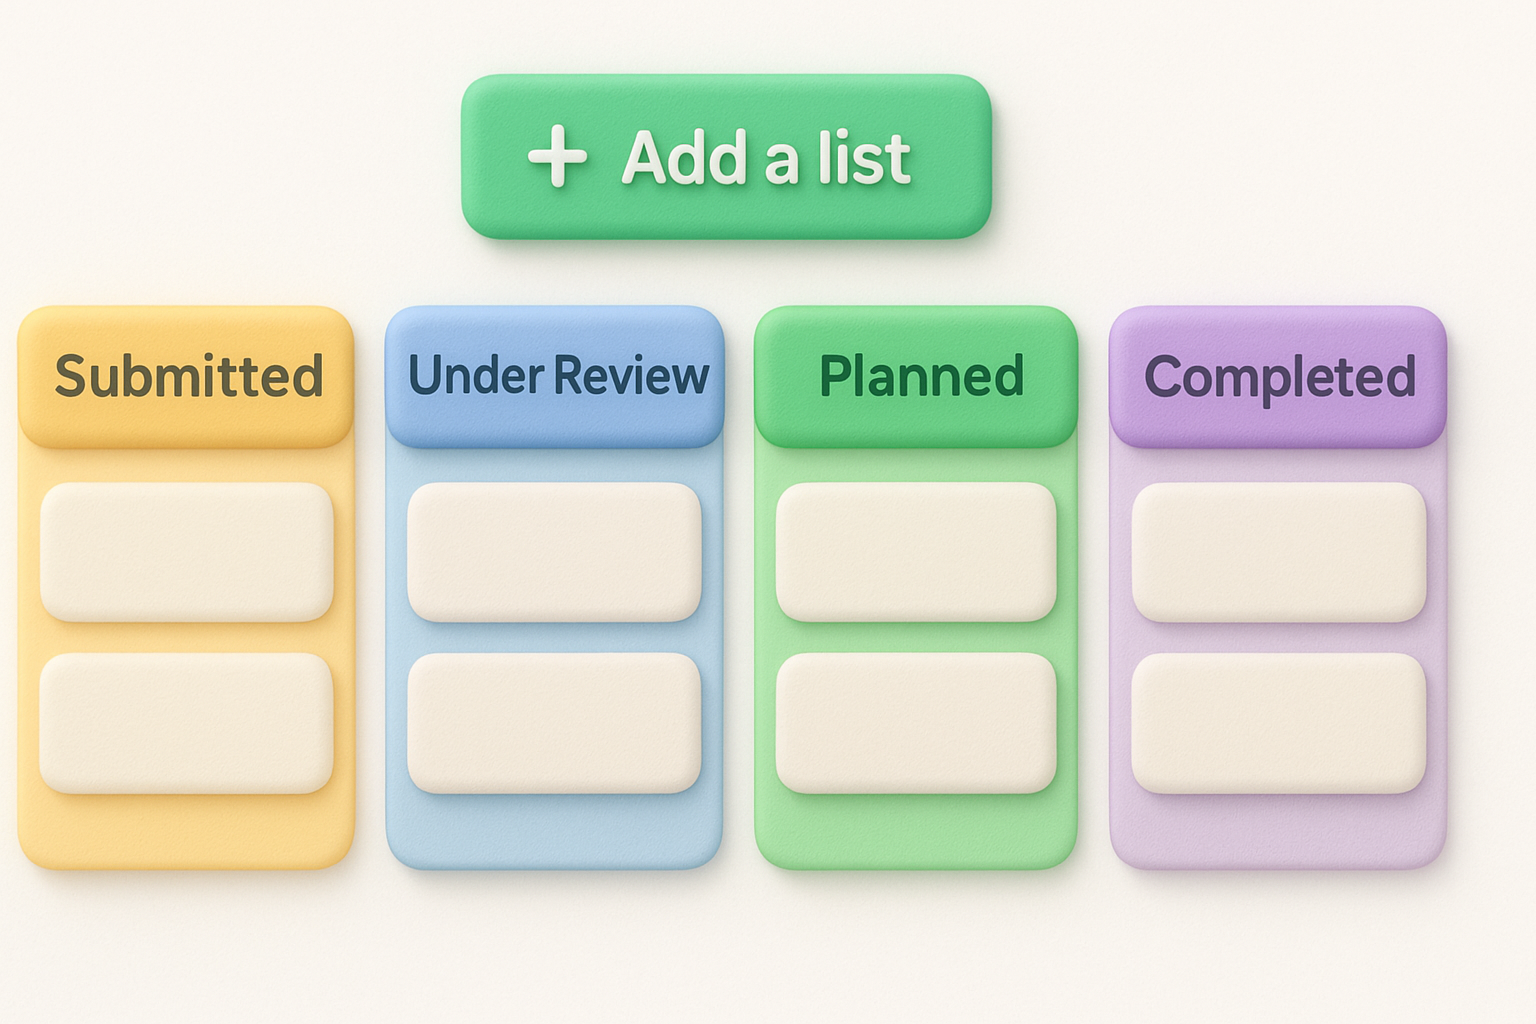
Add a fifth list called Not Planned if you want to show users which requests you've decided not to pursue. This list prevents questions about abandoned requests and keeps your main workflow clean.
Position your lists from left to right in the order requests flow through your process, making it easy to visualize progress at a glance.
Click any card on your board, then select "Labels" to access the label settings. Create color-coded labels that represent your main product areas or request types. You can edit both the color and text for each label.
For product areas, you might create labels like "Mobile App," "API," "Dashboard," and "Integrations." If you prefer request types, use labels like "New Feature," "Enhancement," and "Integration Request." Limit yourself to six to eight labels to keep categorization manageable.
Install the Custom Fields Power-Up from Trello's power-ups menu. This feature lets you track additional data on each card, such as priority level, number of user requests, or estimated effort. Add fields like:
Custom fields appear on every card and make it easier to sort and filter requests when you need to prioritize your roadmap.
A standardized card format makes your Trello feature request board easier to scan and helps your team extract the information they need quickly. Every card should follow the same structure so anyone reviewing requests knows exactly where to find key details without hunting through inconsistent descriptions.
Start by creating a template card that you'll copy for every new feature request. Click "Create a new card" in your Submitted list and name it "TEMPLATE: Feature Request." In the description field, add your standard format with clear sections that guide submitters through providing complete information.
Your template should include prompt questions that help users explain their request thoroughly. This structure prevents vague submissions like "Make the app better" and instead produces actionable feedback your team can evaluate and prioritize.
A well-structured template reduces back-and-forth questions and ensures you collect the information needed to evaluate requests on the first submission.
Copy this template into your Trello card description and adjust it to fit your product:
**What problem does this solve?**
[Describe the user problem or pain point]

**Proposed solution**
[Explain the feature or change requested]

**Who requested this?**
[Company name or user segment]

**Use case**
[How would this feature be used in practice?]

**Business impact**
[Why this matters: revenue risk, churn prevention, competitive need]
Save this template card and use it as your starting point for all new requests. You can also convert it into a Trello card template using the board menu under Templates, making it one click to create properly formatted cards. This approach eliminates the need to copy and paste from a separate document every time someone submits a request.
Your Trello feature request board needs a clear submission process and a way for users to show which features matter most to them. The method you choose determines how much moderation work you'll handle and how engaged your users feel in shaping your product direction.
You have three main options for letting users submit requests to your trello feature request board. The direct submission approach lets users create cards themselves if you make the board public and enable commenting permissions. This method increases engagement but requires you to monitor for spam or duplicate requests.
The form-based approach uses Google Forms or Typeform to collect submissions, which you then manually convert into Trello cards. This gives you complete control over what appears on the board and lets you deduplicate similar requests before they become visible. Your form should mirror the card template structure you created in Step 2.
Email submission offers a middle ground where users send requests to a dedicated email address and your team creates cards from those messages. Trello's Email-to-Board feature can automate this process by forwarding emails directly into your Submitted list, though you'll still need to format them properly.
Choose the submission method that matches your team's capacity for moderation and your users' technical comfort level with Trello.
Install the Voting Power-Up from Trello's power-ups menu to let users vote on feature requests. This power-up adds a simple vote button to each card, and you can see the total vote count at a glance. Enable this feature and explain the voting system in your board description so users understand how to participate.

Consider setting voting guidelines that prevent ballot stuffing. You might limit votes per person or require users to sign in with Trello accounts to vote. Track vote counts in your custom fields from Step 1 to make sorting and filtering easier during prioritization sessions.
Your Trello feature request board becomes valuable when you actively manage the cards flowing through it. This step transforms your board from a static list into a decision-making tool that helps you build the right features and keeps users informed about their requests.
Check your Submitted list at least weekly to process new feature requests. Read each card against existing requests to find duplicates or similar ideas already on your board. When you find duplicates, merge them by adding the new requester's information and vote count to the original card, then archive the duplicate.
Look for requests that need more information before you can evaluate them properly. Add comments asking specific questions about the use case, expected behavior, or business impact. Move incomplete requests to a "Need More Info" label or list until submitters provide the missing details.
Consistent triage prevents your board from becoming cluttered with duplicates and ensures every request has enough context for proper evaluation.
Sort your Under Review list by vote count and business impact to identify which requests deserve attention first. Create a simple scoring system that weighs customer votes, revenue potential, and strategic alignment. A request from a large customer facing churn risk might outrank a feature with more votes from individual users.
Move high-priority items to your Planned list and add target dates using Trello's due date feature. Add comments explaining why you selected certain requests over others, which helps users understand your product strategy when they review the board.
Comment on cards whenever you move them between lists to notify everyone watching that card. Write brief updates that explain what happened and what comes next. When you complete a feature, add a final comment with release notes or documentation links before moving the card to Completed.
Your trello feature request board is ready to collect and organize user feedback. Start inviting users to submit requests and make voting a regular part of your product planning process. Review your Submitted list weekly, prioritize based on votes and business impact, and keep requesters updated as their ideas move through your workflow.
Trello works well for small teams or early-stage products with manageable request volumes. The visual board layout makes it easy to see progress at a glance, and the flexibility lets you customize your workflow as needs change. You can start collecting feedback immediately without complex setup or training.
As your feedback volume grows, you might find Trello's limitations frustrating. Manual deduplication takes time, prioritization requires spreadsheets or custom scoring, and users need Trello accounts to vote effectively. Koala Feedback handles these challenges with automatic deduplication, built-in prioritization tools, and a dedicated feedback portal that requires no account creation.

Start today and have your feedback portal up and running in minutes.