HubSpot sits at the center of many SaaS operations, managing contacts, deals, tickets, and marketing workflows. When you need to connect it with other tools in your stack, the HubSpot API documentation is your starting point. But if you've ever landed on their developer portal for the first time, you know it can feel like drinking from a firehose, hundreds of endpoints spread across CRM, Marketing, CMS, and Operations hubs, each with their own authentication requirements and rate limits.
The good news: once you understand how the documentation is structured, building integrations becomes far more straightforward. This guide breaks down how to navigate HubSpot's API docs, authenticate your requests, work with core endpoints, and handle common pitfalls that trip up developers during implementation.
At Koala Feedback, we help product teams collect and prioritize user feedback to build what actually matters. Many of our users connect their feedback workflows with CRM platforms like HubSpot, syncing feature requests with contact records, linking deal stages to roadmap items, or triggering feedback prompts based on customer activity. Whether you're building a similar integration or tackling something entirely different, understanding HubSpot's API is the first step. Here's how to make sense of it.
The HubSpot API documentation lives at developers.hubspot.com and organizes hundreds of endpoints across six main product areas: CRM, Marketing, CMS, Conversations, Automation, and Settings. Each area has its own reference section with endpoint listings, request/response schemas, and code samples in multiple languages including JavaScript, Python, PHP, and cURL. Before you write a single line of code, spending 20 minutes exploring this structure will save you hours of confusion later.
Understanding which product area owns the data you need is the fastest way to navigate the documentation. The CRM area covers contacts, companies, deals, tickets, line items, products, and custom objects. Marketing covers email, forms, lists, and campaigns. CMS handles pages, blogs, and HubDB tables. Conversations covers the inbox, threads, and messages from chat and email. Automation exposes workflows and sequences. Settings manages users, teams, account details, and integrations configuration.
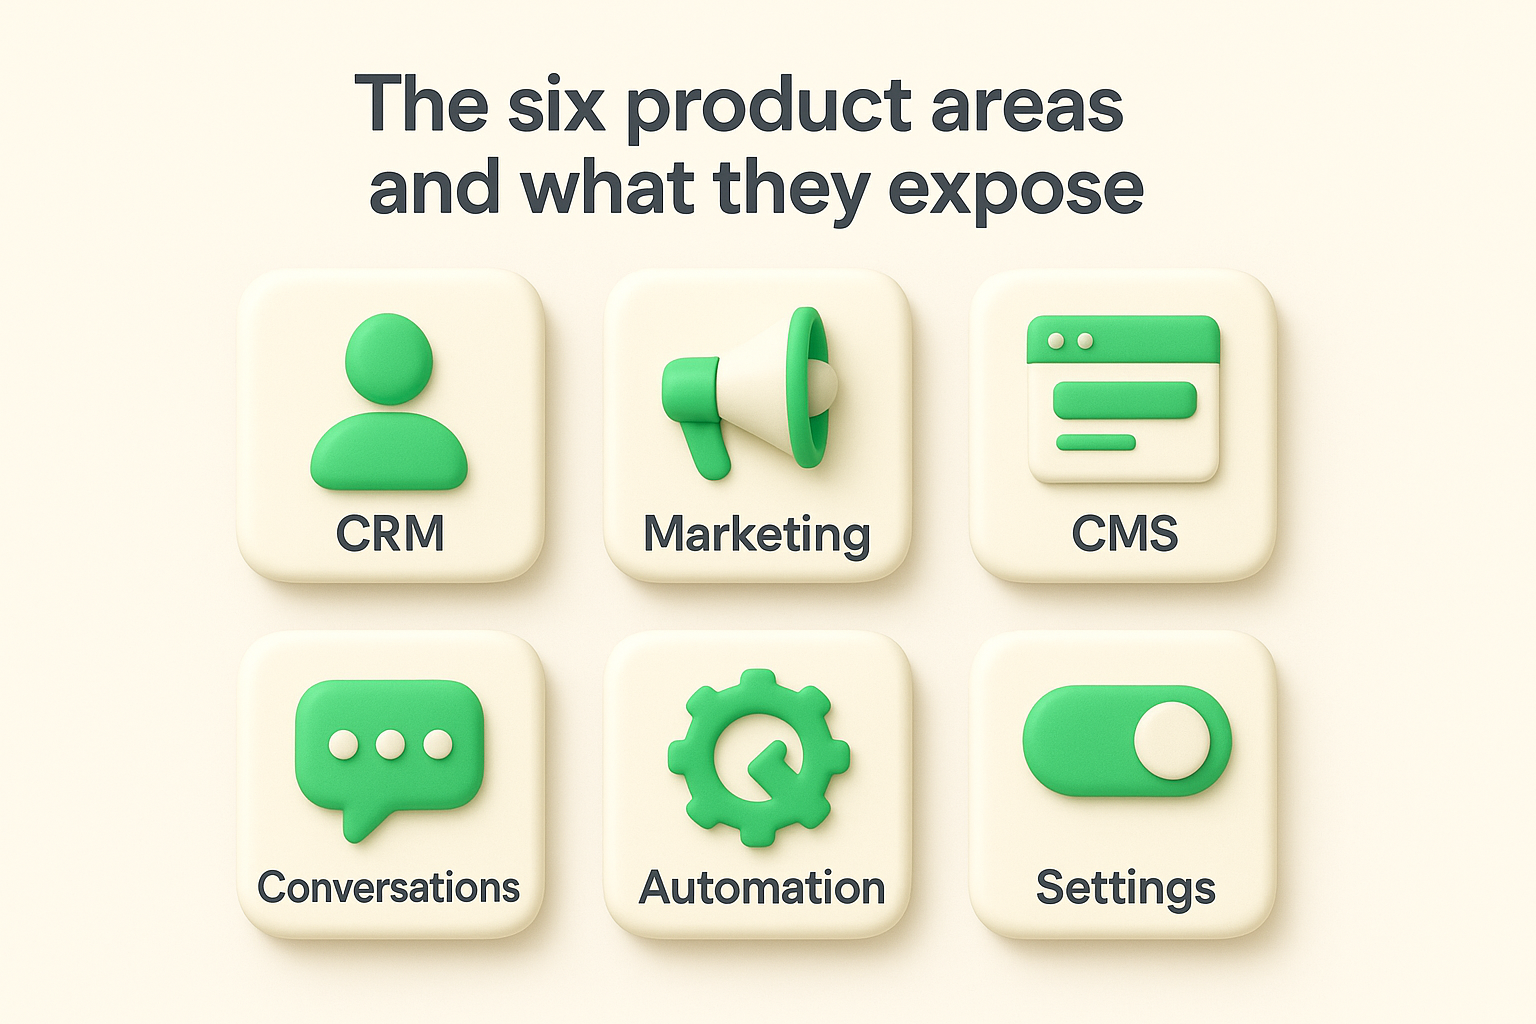
Pick the product area first, then drill down to the specific object or action. This approach cuts your search time in half compared to browsing randomly.
Here is a quick reference for the six areas and their common use cases:
| Product Area | Common Objects | Typical Use Case |
|---|---|---|
| CRM | Contacts, Deals, Tickets | Sync users, track pipeline stages |
| Marketing | Forms, Lists, Emails | Trigger campaigns from external events |
| CMS | Pages, Blogs, HubDB | Headless CMS builds |
| Conversations | Inbox, Threads | Pull support chat history |
| Automation | Workflows, Sequences | Trigger follow-ups from external tools |
| Settings | Users, Teams | Provision accounts programmatically |
HubSpot completed its migration from v1/v2 endpoints to the v3 and v4 API structure, and the documentation reflects this fully in 2026. The older endpoints still work but carry deprecation notices, and HubSpot has set firm sunset dates on several of them, particularly in Contacts and Engagements. The v3 CRM APIs introduced a consistent object model across all CRM record types, which means the patterns you learn for contacts apply almost identically to companies, deals, and custom objects.
The v4 Associations API replaced the older association logic and now supports association labels, letting you define the relationship type between two records. If you are building anything that links records together, such as syncing feedback submissions to deals, you need the v4 version. Check the changelog section inside the developer portal regularly because HubSpot updates it with deprecation timelines and new endpoint releases on a rolling basis.
Before you write any code, you need to identify which API covers your use case and which version is currently active. Go to developers.hubspot.com and use the left-side navigation to browse by product area, then by object. For example, if you need to read or write contact records, navigate to CRM, then Contacts, then review the available endpoints. The hubspot api documentation labels deprecated endpoints with a warning banner at the top of the page, so you will know immediately if you are looking at something you should avoid.
If you land on a page that shows a deprecation notice, scroll down to find the link to the replacement endpoint before you go any further.
HubSpot's current stable API version for most CRM objects is v3, with Associations sitting at v4. You can confirm the version by looking at the URL structure in each request example shown in the docs. A v3 contacts endpoint looks like /crm/v3/objects/contacts, while a v4 association endpoint looks like /crm/v4/associations/{fromObjectType}/{toObjectType}/batch/create. If the URL in the docs shows v1 or v2, treat it as a signal to check whether a newer version exists.
Once you confirm the version, write down the exact endpoint path and HTTP method you need before moving to authentication. Use this simple checklist:
This mapping step prevents you from building auth and test scaffolding around the wrong endpoint, which wastes significant time.
HubSpot uses private apps as its primary authentication method for server-side integrations. When you create a private app inside your HubSpot portal, it generates a Bearer token that you include in every API request header. This replaces the older API key system, which HubSpot deprecated, and gives you granular control over which scopes your integration can access.
To create a private app, go to your HubSpot account settings, navigate to Integrations, then Private Apps, and click Create a private app. Give it a name, then select only the scopes your integration actually needs rather than enabling everything. For a basic CRM read integration, you need crm.objects.contacts.read. Once you save, HubSpot displays your access token one time, so copy it immediately and store it in a password manager or your environment's secret store.
Never hardcode your access token directly in your source code. Use environment variables instead.
Open Postman and create a new collection for your HubSpot work. Under the collection's Authorization tab, set the type to Bearer Token and paste your access token. This applies the token to every request in the collection without you having to set it individually. Use Postman's environment variables to store the token so you can swap between test and production credentials cleanly.
Send a test GET request to https://api.hubapi.com/crm/v3/objects/contacts?limit=10 to confirm your setup works. A 200 response with a JSON body containing a results array means your auth is configured correctly. If you receive a 401, your token is missing from the header. If you receive a 403, you need to add the missing scope to your private app inside the hubspot api documentation portal and regenerate the token.
With authentication working, you are ready to pull CRM records. The hubspot api documentation describes two main read patterns: fetching a specific record by its ID, or searching across all records using filters. Knowing which pattern fits your use case determines the endpoint you use and how you handle the response.
To read a single contact by ID, send a GET request to /crm/v3/objects/contacts/{contactId}. Add a properties query parameter to specify exactly which fields you want returned, otherwise HubSpot returns only a small default set. For example: /crm/v3/objects/contacts/12345?properties=email,firstname,lastname,lifecyclestage.
For bulk reads, use the batch read endpoint at /crm/v3/objects/contacts/batch/read with a POST body that lists record IDs and properties:
{
  "properties": ["email", "firstname", "lifecyclestage"],
  "inputs": [
    { "id": "12345" },
    { "id": "67890" }
  ]
}
When you do not have record IDs upfront, use the search endpoint at /crm/v3/objects/contacts/search. Send a POST request with a filter group to match records by property value. The example below finds all contacts with a lifecycle stage of "customer":
{
  "filterGroups": [{
    "filters": [{
      "propertyName": "lifecyclestage",
      "operator": "EQ",
      "value": "customer"
    }]
  }],
  "properties": ["email", "firstname"],
  "limit": 100
}
Keep your filter groups as specific as possible to avoid hitting the 10,000-record search result cap that HubSpot enforces.
Search and list responses include an after cursor inside the paging.next object when more results exist. Pass that cursor value as the after query parameter in your next request to retrieve the following page. Continue this loop until the response contains no paging.next object, which signals you have reached the last page.
Writing data to HubSpot follows the same object model you used for reads, which keeps the learning curve short. Once you understand how creates and updates work for one object type, you can apply the same pattern to contacts, deals, tickets, and custom objects without starting from scratch each time.
To create a contact, send a POST request to /crm/v3/objects/contacts with a properties object in the body. Only include the fields you actually have values for, since HubSpot ignores null fields on create:
{
  "properties": {
    "email": "[email protected]",
    "firstname": "Alex",
    "lastname": "Rivera",
    "lifecyclestage": "lead"
  }
}
To update an existing record, send a PATCH request to /crm/v3/objects/contacts/{contactId} with the same properties structure. HubSpot only modifies the fields you include, leaving all other properties untouched. This makes partial updates safe to run without overwriting data you did not intend to change.
The hubspot api documentation for associations lives under the v4 CRM section and uses a batch endpoint to link two records together. To associate a contact with a deal, send a POST request to /crm/v4/associations/contacts/deals/batch/create with the following body:
{
  "inputs": [{
    "from": { "id": "12345" },
    "to": { "id": "67890" },
    "types": [{ "associationCategory": "HUBSPOT_DEFINED", "associationTypeId": 4 }]
  }]
}
Check the Associations section of the developer portal to find the correct
associationTypeIdfor each record pair, since the ID differs depending on which object types you are linking.
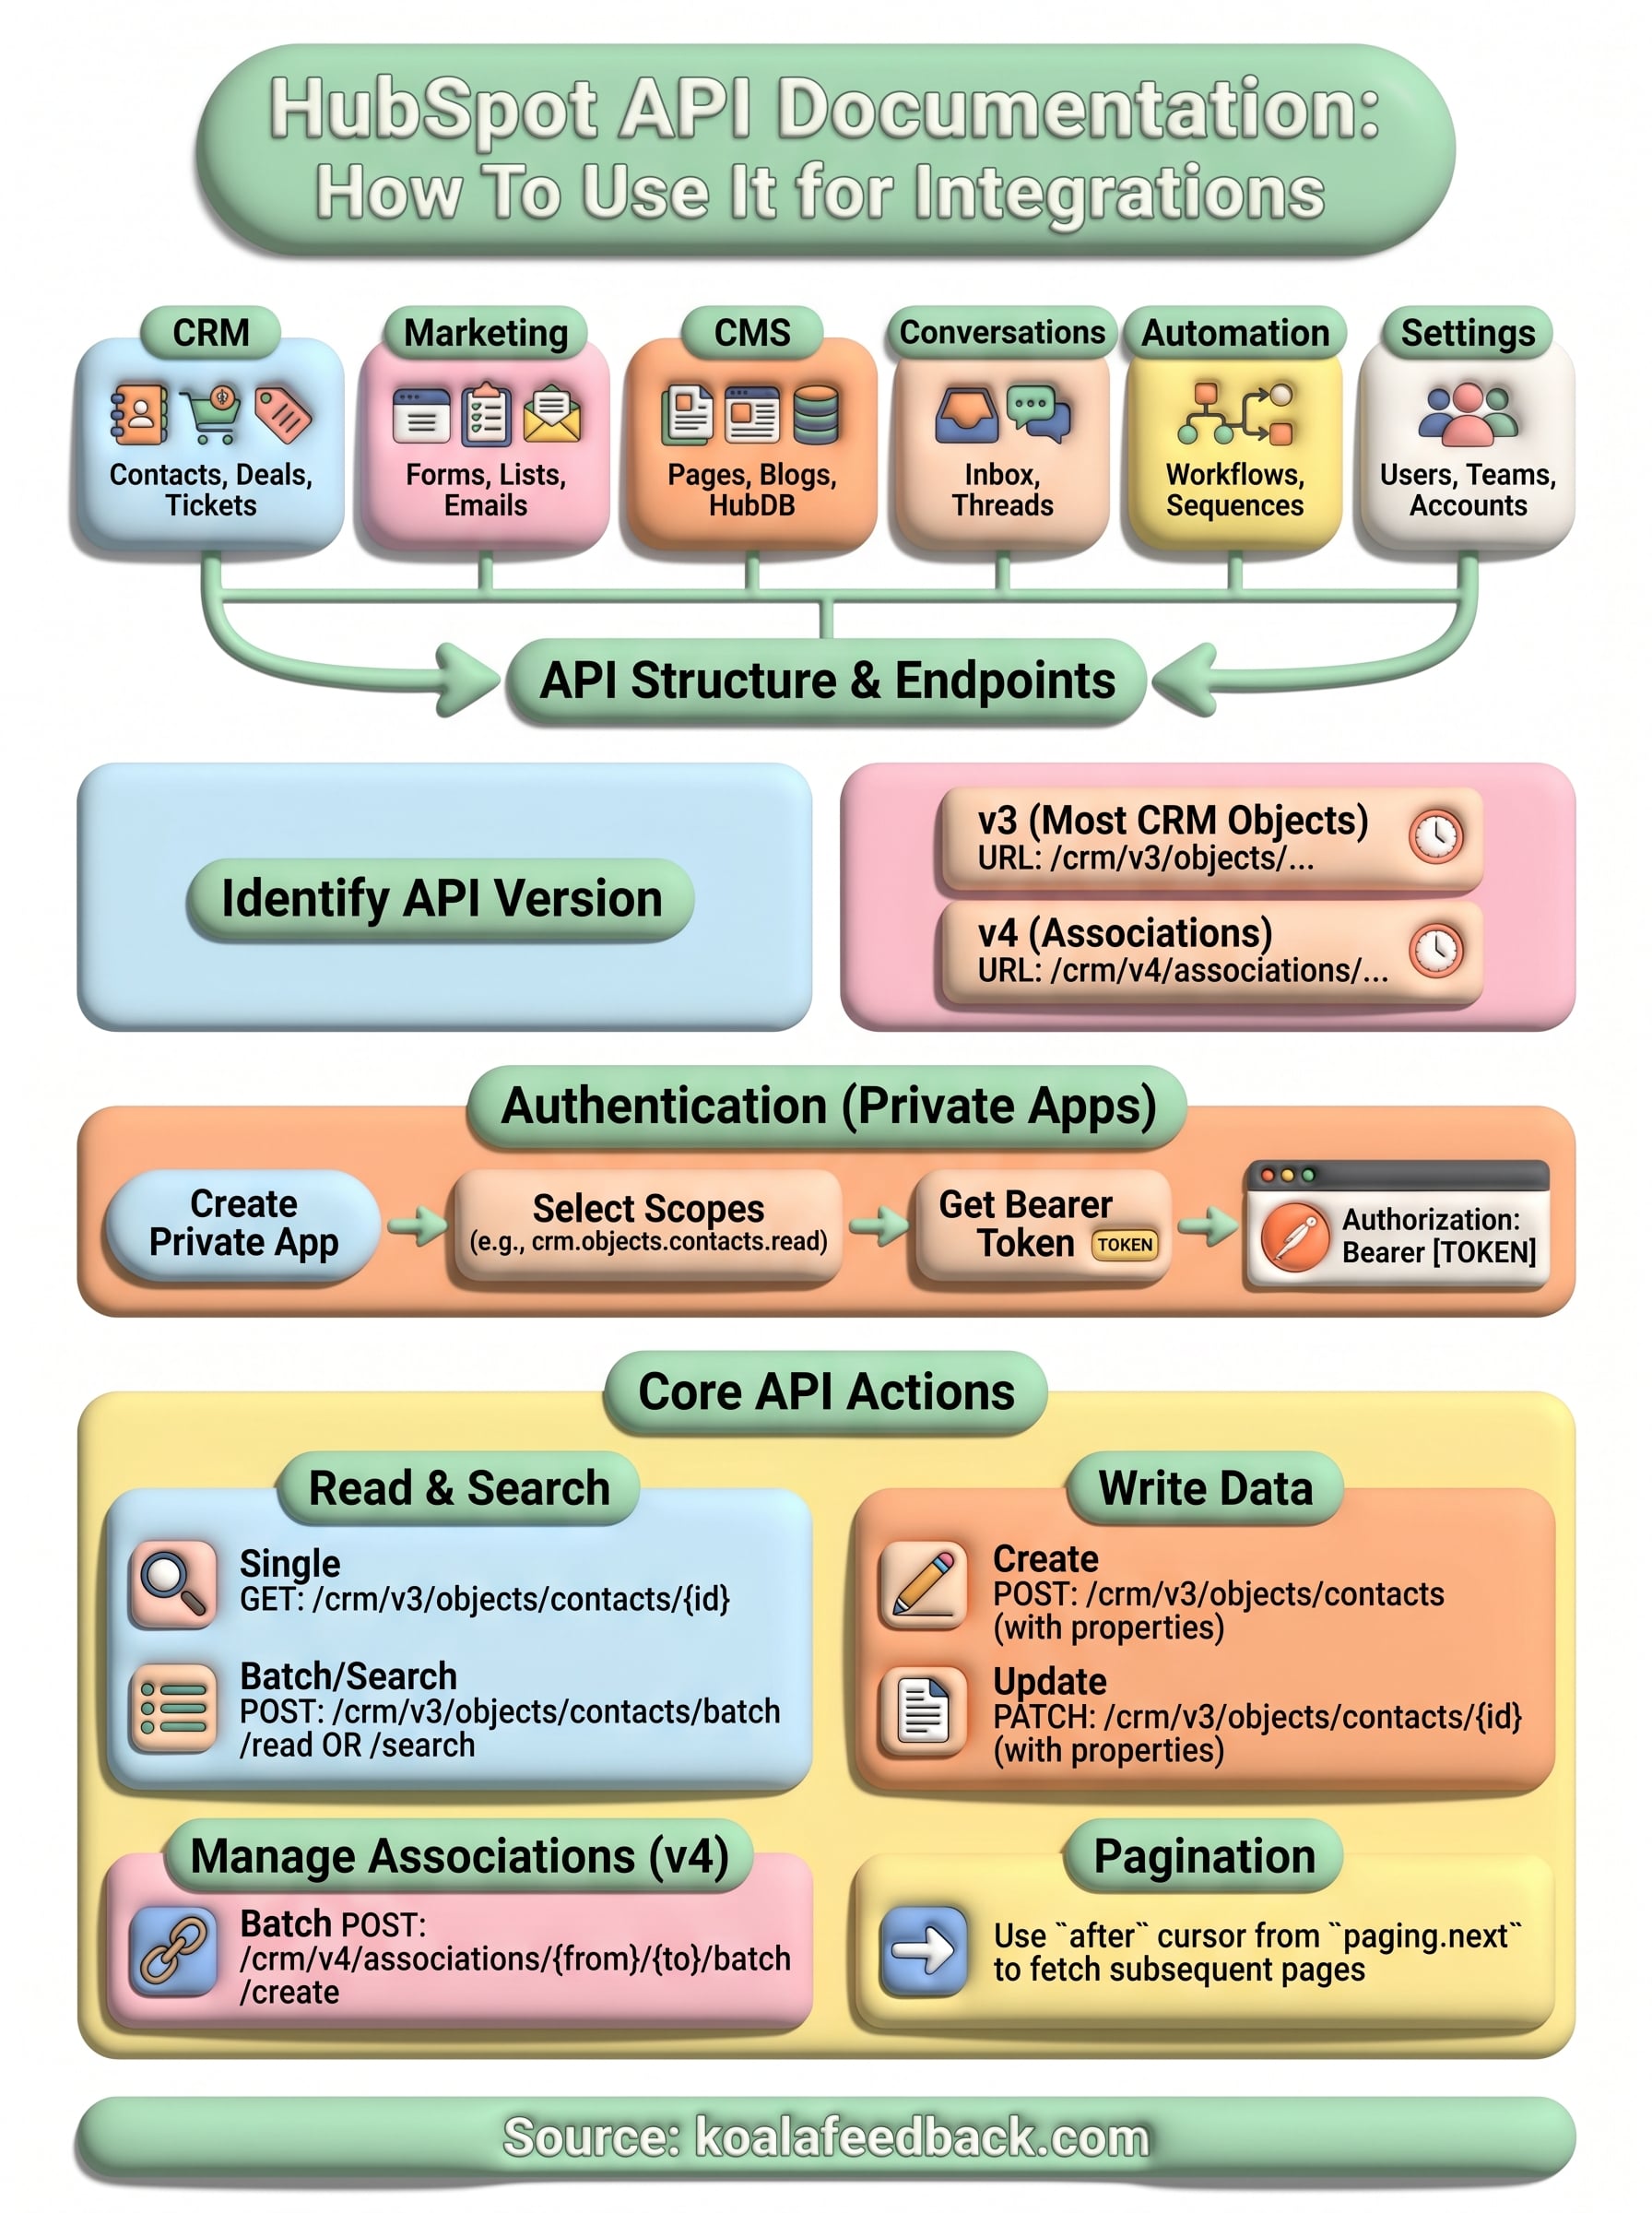
You now have a working path through the HubSpot API documentation: identify your product area, confirm the correct version, authenticate with a private app, and apply consistent read and write patterns across any CRM object. The same approach scales whether you are syncing a handful of contacts or building a multi-object pipeline that touches deals, tickets, and associations.
Your next move is to map this to a real workflow. Pick one integration endpoint from the steps above, get a 200 response in Postman, then wire it into your application. Once HubSpot data flows reliably into your stack, you can start acting on it.
If your team collects user feedback that should inform which integrations you build next, Koala Feedback gives you a dedicated portal to capture, prioritize, and track those requests so the right features get built first.

Start today and have your feedback portal up and running in minutes.